How To Restore Hardwood Floors Without Sanding
Hardwood floors in any home can take a beating; between moving furniture, general wear and tear, and regular cleaning, your hardwood floors could probably do with a touch-up.
I had to restore my hardwood floors because they had lost their pristine stylish look and looked dull and unappealing. But I had no idea how to restore hardwood floors without sanding them.
You can restore your hardwood floor using one of these methods: a store-bought chemical abrasion kit, buff, and re-coat the hardwood floors using polyurethane, or you can deep clean the floors. These are the best ways to restore your hardwood floors without sanding them first.
I needed to use a method that did not involve sanding my hardwood floors, so I got some help from a contractor friend. He gave me a few interesting options, and I was very happy with the result. I wanted to share the information I learned in this process in this post.
How To Restore Hardwood Floors Without Sanding
We all know that sanding hardwood floors is a good way to restore the wood and bring a dull hardwood floor back to life.
The downside to sanding hardwood floors is that it is labor-intensive, and the dust is a nightmare to clean.
So can you restore your hardwood floors without sanding the floors and dealing with excessive amounts of wood dust?
Considerations Before Restoring Your Hardwood Floors
Before you start pulling out the supplies, there are a few things you have to look at.
What Type Of Hardwood Floors Are In Your Home?
You should really consider the type of wood flooring in your home. The type of wood might influence how you restore it and what kind of products you can use on it. So knowing the kind of wood will help you take the best approach to restore it.
How To Test If You Have A Wax Or Polyurethane
If you are unsure if your hardwood floors have a wax or polyurethane coating, the best way to check is to find a spot behind a door or a cupboard, put some mineral spirits on a rag and rub it on a small spot.
If the rag pulls up clean, you are good to go, and you can restore your hardwood floors normally, but if the rag comes back with a brown stain, then your hardwood floors have a wax coating, and you won’t be able to restore it in the normal fashion.
We will be discussing how to refinish a waxed hardwood floor later in the post.
Deep Cleaning Your Hardwood Floors
I know this method sounds obvious, but with the right supplies and a little elbow grease, you won’t need to touch a sander to get your hardwood floors looking shiny and new in no time.
What You Will Need
If you want to use this method before pulling out the buffer, then you will need these supplies:
Choosing The Right Cleaning Agent For Hardwood Floors
You might be tempted to use any cleaner or liquid soap you have in your cupboard to clean your hardwood floors, but you need to resist that urge. Remember that you should never use steam, vinegar, water, or soap cleansers that make suds to clean hardwood floors.
Cleaners that produce a lot of suds leave a sticky residue on the floors that trap dirt and grime into the fine lines of your hardwood floors. You should check if your floors are sealed with polyurethane or wax.
If your hardwood floors are sealed with polyurethane, you should avoid using natural or chemical cleaning products as these products have acidic additives that will damage the sealant and the hardwood over time. You can use a pH-neutral soap instead.
If your hardwood floors are only sealed with wax, you can use a cleaning agent made for hardwood floors that are waxed and a damp cloth, not wet as the floors are not sealed; using water will warp the hardwood.
The Method
The first step is to remove all the furniture from the room. It will make the process much easier. Then you have to sweep the entire floor.
Then it would help if you used the vacuum to pick up all the stubborn dirt stuck between the floorboards and in the corners. Now you should use a mop with a soft micro cloth and cleaner specifically made to clean hardwood floors.
Keep in mind that some hardwood floors will need to be cleaned professionally, especially because floors are high traffic areas, and using the wrong products can cause soap and dirt build-up that needs to be removed by a scrubbing machine.
Pros Of Deep Cleaning Your Hardwood Floors
Some of the pros of deep cleaning your hardwood floors include:
Cons Of Deep Cleaning Your Hardwood Floors
Some of the cons to deep cleaning your hardwood floors include:
Using A Store-Bought Abrasion Kit To Restore Harwood Floors
These kits have most of the supplies you need in the kit, but you will need to ensure there is enough ventilation; the restore kit is low-odor, but it’s best to be safe.
You will also need:
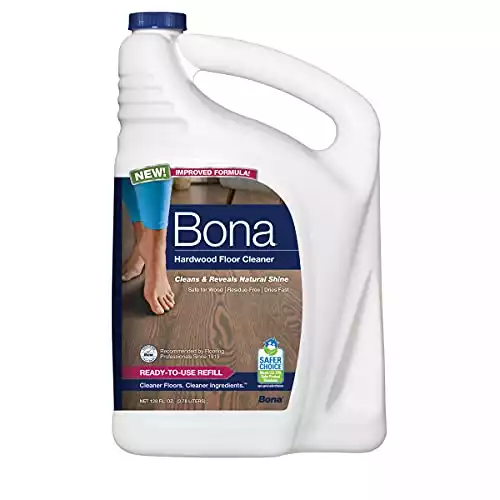 Bona Hardwood Floor Cleaner Refill
- When applied with a microfibre cleaning cloth, this streak-free formula leaves behind no dulling residue for a mirror-looking finish.
- Fast drying solution that is easy to use and has limited downtime as your floors can be walked on almost immediately after the finish application.
- Specifically formulated for hardwood floors and offers excellent lasting protection with its high-quality ingredients and Ph-neutral blueprint.
- Great for those that care about their environmental footprint as this product has the certified Greenguard GOLD stamp of approval.
Step 1: Preparing The Room
You have to clear the room of any furniture and curtains, and unfortunately, you will need to take the doors off their hinges. As much as it is a pain, you won’t be able to reach all the places you need to if you can’t get to them. So you need to ensure that nothing blocks you from restoring the entire floor.
Next, you need to use a vacuum cleaner and a damp mop to clean all surfaces, including window sills, blinds, and other surfaces. If you don’t, small particles might land on the floor, creating dents and imperfections after the finish hardens.
Remove any packed gunk with an abrasive sponge and leave your wood floors to dry. Now prepare the rest of the room by plugging any vents or openings with old towels. Close any doors and windows and turn off any fans to minimize dust getting into the room while you are busy.
Step 2: Applying The Chemical Abrasion To The Hardwood Floors
The first step to using an abrasion kit is to attach the pad on the block and screw it to the broom or mop handle. You need to put the plastic bag in the shoebox so it can prevent any spills and catch any drips. Using a shoebox instead of a paint tray will make it easier to dip the pad in.
Don’t take too big sections at a time; the abrasive liquid will sit too long if you scrub too big sections. If the abrasive liquid sits for longer than 5 minutes, it will seep into the cracks and might damage the floors. You want a thin layer of abrasive liquid, not puddles.
Remember not to mop the floors; you have to apply a little pressure and scrub in the small 4 ft x 4 ft sections. That will help roughen the surface enough so the new finish will cling to it better. When you are scrubbing the floor, go with the grain of the wood, it will work better that way. You should wipe the excess abrasive liquid with a towel as you go, so there is only a thin layer left on the floor.
Now you need to let the abrasive liquid dry for 30 minutes. While you wait, you can throw away the pad you used to apply the abrasive liquid. Remember not to throw away the block, as you will need it when applying the finish to the hardwood floor.
Step 3: You Have To Clean The Floor Again
After the abrasive liquid is dry (etched into the wood), you need to neutralize the etcher (abrasive liquid) and clean up any residue. You can use a damp mop dipped in warm water with a teaspoon of dish soap in it.
Ensure the mop is not wet but damp so you won’t damage your floors as they are now vulnerable before being sealed again. Work in small circles to allow you to control the amount of water you use. Dry up any puddles when they occur. Wear clean shoes when mopping the floor to keep the room free from dirt or dust contamination.
Step 4: Time To Touch Up The Floor
The last step before you apply the new finish is to fill in and fix any scratches. You can use a painter’s brush or cotton swab for this task. Apply some stain that matches the floor to the scratches. Feather the stain out to blend with the rest of the floor better.
Blot the stain with a rag, so it lightens to the right color. Use a hairdryer to dry the stain for a minute, then apply a thin layer of the finish you got with the kit. Feather out the finish just like you did with the stain, so you don’t feel or see any rough edges. Dry the finish with the hairdryer.
Step 5: Applying The Finish To The Floor
In this step, you will need some help. You don’t want to be backed in a corner without help. You should wear shoe covers when applying the finish. Put the finish applicator that comes with the kit on the block you used earlier. Now use another plastic-lined box to pour the finish in.
Remember not to squeeze out the last of the finish, as this will create bubbles in your finish. Now apply a thin layer of the finish to the floor, working in sections, so you don’t get backed into a corner. Your helper can apply a coat of finish to the sides, working carefully to not paint the finish on the walls.
When you start applying the coat (after your helper has done the sides), your helper should go over each section as you finish to catch any excess finish before it dries, as it will create a dry-brush look that looks streaky and unprofessional.
Step 6: The Finishing Touch
For the best results, you should wet the finish applicator or brush and dry it off until it’s barely damp. It will loosen up the stiff brush and make it easier to work with. The finish’s color will have a milky hue, but it dries down clear.
In most cases, the finish that you apply dries down in 10-15 minutes, so if you have any thick, steaky, or dripping areas, you need to fix them before the finish gets to the sticky jelly stage. That will make it impossible to straighten out, and you need to leave it if it does get sticky, or you will be creating a bigger problem.
Step 7: Thoroughly Spot Check
If you missed a spot with a thicker piece, you should let it dry completely and remove it with a razor, but only if the streaks or drips are very noticeable. You can leave the coat to dry, and your floor will look stunning. In most cases, you don’t need a second coat, but it is still advised to apply a second coat.
It will seal off any missed areas, add an extra layer of protection to your hardwood floors and hide the deeper scratches in the hardwood. Make sure you have enough finish for a second coat and only start applying the second coat once you have enough, or you will have a streaky overlapped finish that won’t look good.
Step 8: Letting It Dry Thoroughly
This is the last step to restoring the hardwood floors using an abrasive kit. Most kits state that you can walk on the floor 8 hours after applying the finish, but it is not recommended as you might scuff the surface before it has had time to cure.
You should wait between 18 and 24 hours before walking on the floor with clean socks and 14 days before bringing in any furniture or rugs. While the finish dries down in 24 hours, it takes up to two weeks for the finish to properly cure.
Pros To Using An Abrasion Kit To Restore Hardwood Floors
Some of the pros to using an abrasion kit include:
Cons To Using An Abrasion Kit To Restore Hardwood Floors
Some of the cons to using an abrasion kit include:
Polyurethane And Buffing To Restore Your Hardwood Floors
The last way you can restore your hardwood floors without sanding them is to buff the floor and coat it in polyurethane.
This is similar to the chemical abrasion kit, but you will buff out the scratches and scuff the old sealant instead of applying a liquid and scrubbing.
It might look more like you are sanding your hardwood floors, but you are only buffing sealant a little, so the new finish can properly bond with the wood floor.
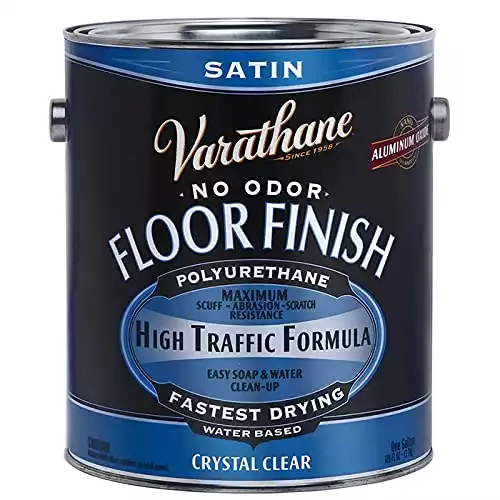 Rust-Oleum Polyurethane Hardwood Floor Finish
- Utilizes a unique aluminum oxide nanotechnology formula that delivers lasting adhesion and scuff and scratch resistance protection.
- This polyurethane finish is ideal for high-traffic areas in your home and provides a crystal clear floor finish even for aged hardwood floors.
- Easy to apply a self-leveling finish that can be used without brush strokes, and when applied, covers 500 sq. ft. of floor space in your home.
- This polyurethane finish is over twice as durable as traditional wood finishes and is fast drying, with your floors being good to go in an hour.
Here Is What You Will Need
Unlike the chemical abrasion kit, you will need a few extra supplies if you choose this method of restoring your hardwood floors.
Step 1: Rent The Proper Equipment
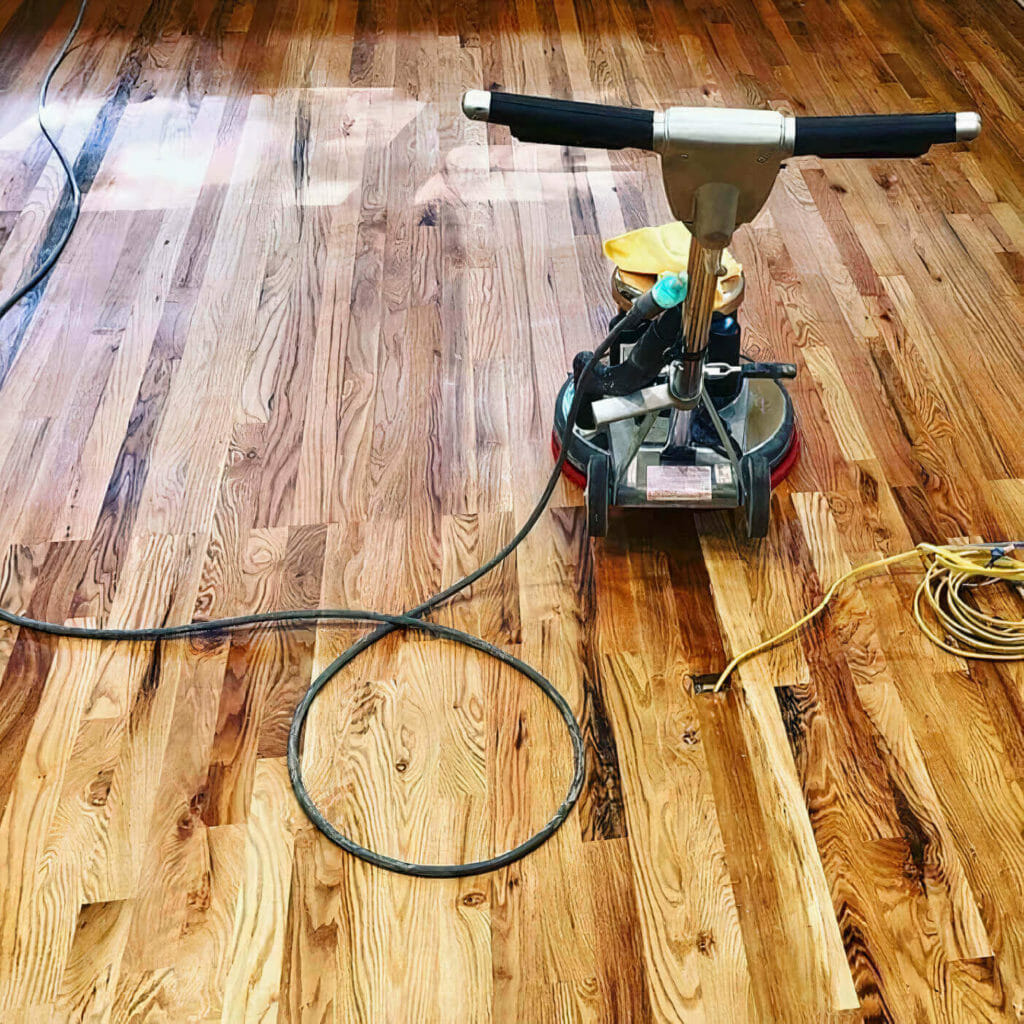
Firstly you have to go to a hardware store and rent a buffing machine. Make sure the day you rent it, you use it as this is the most expensive part of this method. The more time you let slip by without using it, the more you will pay in rental fees.
Step 2: Cleaning The Hardwood Floors
As with all the other methods, you need to clean the hardwood floors before moving on to the next step. Remove all the furniture and use a hardwood floor cleaner to clean the floors.
Ensure you clean all the tough parts that might have stuck-on grime and dirt. If you battle to get these sticky patches clean, you can use a scouring pad that you soaked in mineral spirits.
The sticky patch should come right off. Use painter’s tape to mark out any rough gouges, dings, or deep scratches, as you will be fixing them later on.
Step 3: Addressing The Problem Areas And Fixing The Scratches
In this step, you need to use more mineral spirits. The deeper scratches or areas where the finish has worn away should be doused in mineral spirits. If you have light wood floors, this method will help you darken the gouges and scratches and make them less noticeable.
If you have darker hardwood floors, you should use the same method as discussed in the etching section, by using a cotton swab or painter’s brush and stain. Keep in mind that some gouges are deep and absorb more stain. You will also need to use more stain to cover the scratch, so get a stain that is a little lighter than your floor.
You can layer the stain if you need it, and it won’t be darker than your hardwood floors. You will need more time to fix the problem areas for higher traffic areas. If you have spots where the finish is stripped, use mineral spirits to check how well the color will match. If it looks good, you can add a layer of polyurethane to substitute the stripped-off finish.
Leave the layer of polyurethane to settle and cure for 48 hours before even touching a buffing machine.
Step 4: Fix Any Nails Or Gaps In The Hardwood Floors
If you have any nails sticking out of the floor, you need to hammer them down as they will damage the buffing machine, and it will be costly to fix.
If you see any gaps in the hardwood floor that can’t be covered by a stain or a coat of finish, you need to fill them in with wood filler of the right color or putty.
If you have any ridges that you can’t flatten, you should avoid using a buffing machine and use a sanding screen to buff it by hand, as a machine will destroy the finish between the ridges. For uneven wooden planks, to avoid damage, you need to nail them flush with the rest of the flooring to get a smooth buff and finish.
Step 5: Seal The Entraces And Windows
As discussed in the previous section, you need to cover all the places where the dust can come in and settle, so close or cover the windows, doors, and vents.
Step 6: Set The Buffer On A Sanding Screen
When you hire the buffing machine, ask for a quick tutorial on using a sanding screen to buff the floors. The sanding screens are thin as they are not for sanding hardwood floors but for buffing the finish on the floors. So you will need to time 10-15 minutes as that is how long one sanding screen will last before needing to be replaced.
You need to check the screens every few minutes because a build-up of grime and dust can cause the buffer to sand and scratch your floors instead of buffing them. Replace it with a new sanding screen if you see it has build-up.
Buff the floor by working towards the exit so you won’t back yourself into a corner. Remember, you only need to go over one spot once or twice, or you might ruin the floor with deep scratches.
Step 7: Clean up Time
After buffing your entire hardwood floor, you need to clean up all the dust using a broom or a vacuum. Remember to clean all the surface areas so you don’t have any dust particles that can stick to your finish.
Step 8: Add The Finish
The last and final step in this restoring process is to use the block and broom handle to spread the finish evenly. Follow the same finish spreading process as in the abrasive kit section. You can use oil or water-based polyurethane for this last step.
Then you need to allow the finish to dry and cure. Drying takes a few hours, but it takes at least two weeks for the finish to fully cure.
Pros To Using Polyurethane And Buffing To Restore Hardwood Floors
Some of the pros to using polyurethane and buffing to restore hardwood floors include:
Cons To Using Polyurethane And Buffing To Restore Hardwood Floors
Some of the cons to using polyurethane and buffing to restore hardwood floors include:
How To Restore Waxed Hardwood Floors
If you are unfortunate and have a waxed hardwood floor, any finish, stain, or sealant won’t stick.
Even if you removed the wax, there will still be areas with low traffic where the wax has embedded into the grain of the wood, meaning no sealant would stick.
With that in mind, you only have two options if your hardwood floors are covered in wax:
- You can always apply a new coat of wax and buff it out so that your hardwood floors will have a new shine. It might only last six months before you need to rewax it, but it is a less time and labor-intensive option.
- Or you can sand the floors until the fresh wood underneath the wax is revealed. Unfortunately, there are no other options when dealing with waxed hardwood floors.
When Is Sanding The Only Option?
While this post is about restoring the hardwood floors to their original luster without sanding, there are some situations where you can’t restore the floors without sanding them.
Here is how to tell if sanding your hardwood floors is your only option:
- When the scratches and gouges are so deep that they penetrate the finish or sealant of the floors, no amount of washing, buffing, and waxing will fix this, and you will need to sand the floors to get the best result.
- High-traffic areas where the sealant and previous finish is starting to peel. The old stain will show through if you attempt only to reseal the peeled areas. The areas that are resealed will stick out like a sore thumb.
- When you have pet stains or water damage that has penetrated the barrier of the sealant, you need to sand it to get past those unsightly stains. These stains seep into the floor and will be very easy to spot if you only reseal those parts of the floor.
Care Tips Restoring Your Hardwood Floors
After you have restored your hardwood floors, you want to take care of them and keep them in the best possible condition. Here are three aftercare tips for your hardwood floors:
The Bottom Line
It’s not easy to restore old worn-out hardwood floors to their original glory, but it’s worth it. If you’re attempting to finish a basement the floors of your neglected, sanding might be the better option.
It all depends on the condition of your floors. Remember to never try and use chemicals on waxed hardwood floors, as the waxes don’t offer any real protection.
Hardwood floors should be maintained regularly to help delay the restoring period by a few years. Regularly cleaning your hardwood floors will help keep your hardwood floors in top condition.

