How to Dry Wood in an Oven
Have you ever wondered if you can dry wood in the oven, just like you bake a pie? Surprisingly, your kitchen oven can be a handy tool for small woodworking projects, offering a quick and controlled way to reduce wood moisture.
In a Nutshell:
To dry wood in an oven, start by cleaning the wood and removing the bark. Preheat your oven to its lowest setting, usually around 175°F. Arrange the wood on a rack for even air circulation. Monitor the wood’s moisture content with a moisture meter, aiming for 6-8% for indoor projects. Regularly check and rotate the wood to ensure even drying. The process can take 1-3 hours for thin slices and up to 6 hours for thicker pieces. Always ensure good ventilation in the kitchen during this process.
Can You Dry Wood in an Oven?
Yes, you can! Drying small pieces of wood in an oven can be a handy method, especially when you need to dry them quickly. This approach might be suitable for tiny furniture components or crafting projects.
However, it’s not recommended for larger pieces or drying firewood, as the rapid heat can cause the wood to crack or warp. Like every method, oven drying has its pros and cons.
Pros and Cons of Oven Drying
Pros:
Cons:
Precautions to Take:
- Monitor Temperature: Always ensure the oven temperature is set to the lowest setting to prevent rapid moisture loss, which can cause the wood to crack.
- Check Moisture Content: Regularly check the wood’s moisture content using a moisture meter to prevent over-drying.
- Ventilation: Ensure the kitchen is well-ventilated to allow the moisture released from the wood to escape.
- Safety First: Always wear oven mitts when handling wood in the oven to prevent burns. Also, be cautious of the potential for resin or sap to drip, which could be a fire hazard.
Note: Drying wood in an oven offers a quick solution for small projects. While it has its advantages, awareness of its drawbacks and vigilant monitoring are key. Done right, you’ll have flawlessly dried wood primed for crafting.
How Do You Dry Wood in an Oven at Home?
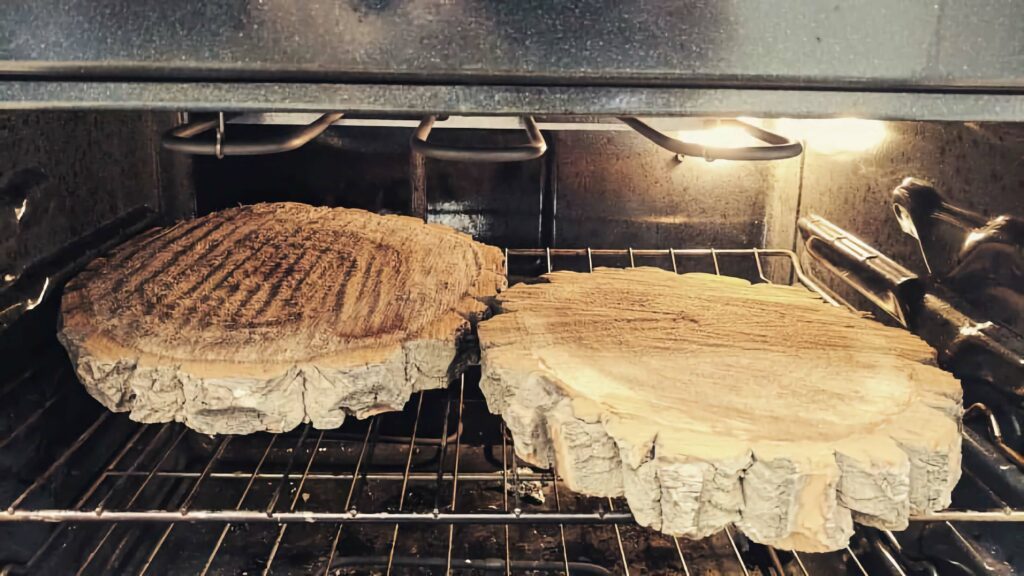
Drying wood in an oven at home is a practical method for small DIY woodworking projects. The process involves removing the moisture content from the wood to prevent warping, cracking, and other moisture-related issues.
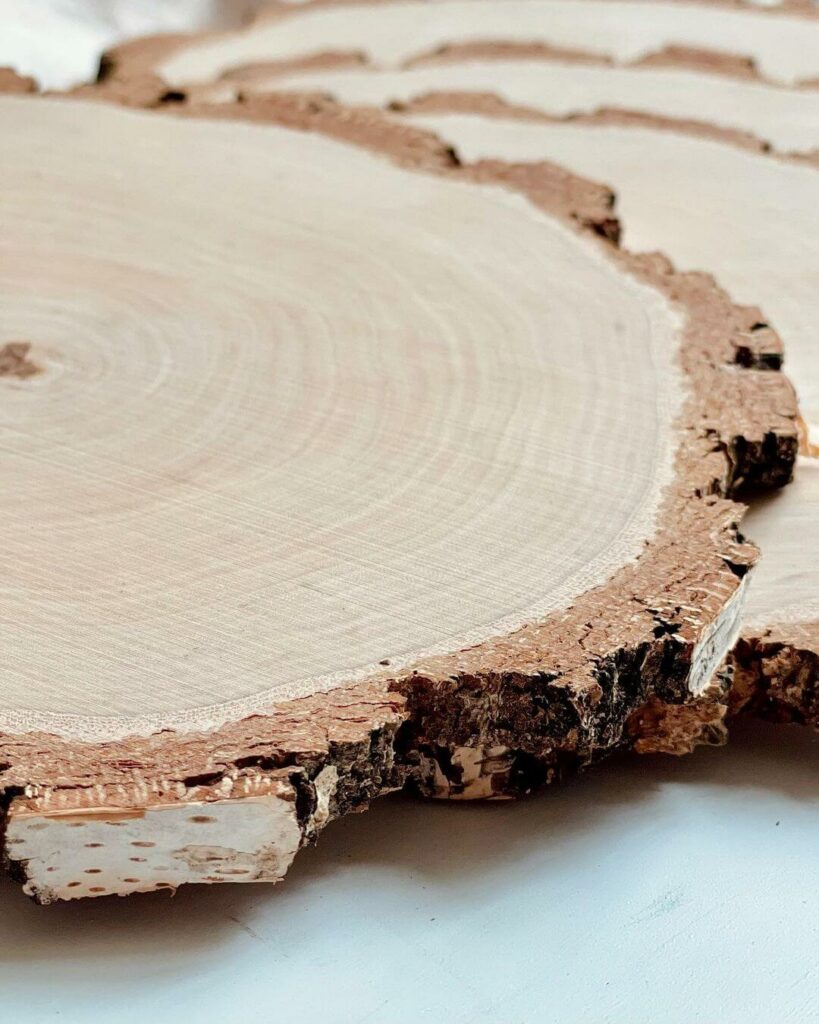
While commercial kilns are used for large-scale wood drying, using an oven is a feasible option for those drying smaller sections of wood like, wood slices.
Let’s dive into the step-by-step process of drying wood in an oven.
Step-by-Step Guide to Drying Wood in an Oven:
Step 1: Selection of Wood
- Choose the Appropriate Thickness: Begin by examining the thickness of your wood pieces. Opt for pieces that aren’t excessively thick. Thicker pieces not only require a longer drying time but also run the risk of uneven drying. The moisture trapped in the core of thick pieces might not evaporate as efficiently as in thinner pieces. This can lead to issues like internal cracks or warping. For optimal results in a home oven, pieces with a uniform thickness ensure consistent drying throughout.
Step 2: Preparation
- Thorough Cleaning of the Wood: Begin your preparation by meticulously cleaning the wood. Use a soft brush to sweep away surface dirt, dust, and any loose particles. Ensuring the wood is pristine is paramount because any residual dirt or debris can hinder the drying process, potentially leading to uneven drying or even discoloration. A spotless surface also ensures that when you measure the moisture content, you get an accurate reading.
- Bark Removal: If your wood piece still has its bark, it’s advisable to detach it. Utilize tools like a bark spud or a drawknife to carefully strip the bark from the wood. The bark, nature’s protective shield for trees, can retain and trap moisture. This can decelerate the drying process and might even lead to undesirable outcomes like mold formation or wood decay. By eliminating the bark, you’re paving the way for a more uniform and efficient drying experience.
Step 3: Oven Preparation
- Setting the Ideal Temperature: Initiate the drying process by preheating your oven. Aim for its lowest temperature setting, which is typically around 175°F (80°C). Maintaining a low temperature is of utmost importance. Overheating can cause the wood’s moisture to evaporate too rapidly, leading to undesirable effects like cracking or warping. A gentle, consistent heat ensures the wood dries evenly and retains its structural integrity.
- Optimizing Heat Distribution: To ensure the wood dries uniformly, position an oven-safe rack in the center of the oven. This central placement facilitates even heat circulation around the wood, preventing any hotspots that might cause certain sections to dry faster than others. The result? A uniformly dried piece of wood, ready for your next project.
Step 4: Positioning the Wood
- Strategic Placement for Optimal Drying: When arranging the wood pieces on the oven rack, it’s crucial to lay them out with intention. Ensure that each piece is spaced out adequately, allowing for gaps in between. These gaps are essential as they promote proper air circulation around each wood piece, facilitating even drying and preventing moisture pockets.
- Temperature Monitoring for Precision: While your oven’s built-in thermostat provides a general temperature reading, for a task as delicate as wood drying, precision is key. Introduce an oven thermometer into the mix. Place it alongside the wood to get an accurate reading of the actual temperature inside. Regularly check this thermometer to ensure the temperature remains steady, making adjustments to the oven settings if needed. This vigilance ensures the wood dries at the desired pace, preventing any rapid moisture loss that could compromise its quality.
Step 5: Drying Process
- Initial Drying Phase: Begin the drying journey by letting the wood settle in the oven’s warmth for an initial span of approximately one hour. This duration serves as a foundational phase, allowing the wood to gradually release its moisture in a controlled environment.
- Moisture Assessment for Precision: Post the initial hour, it’s time for a moisture check. Employ a moisture meter, a tool designed to gauge the moisture content within the wood accurately. If readings indicate that the moisture content remains on the higher side, don’t rush the process. Instead, extend the drying time in careful 15-minute increments, ensuring you’re not rushing the wood’s natural drying rhythm.
- Vigilance Against Over-Drying: As the wood undergoes its drying transformation, it’s imperative to remain attentive. Over-drying is a real concern, and it’s a primary culprit behind wood cracking. By regularly monitoring the wood and being responsive to its needs, you can ensure it dries to perfection without the risk of damage.
Step 6: Cooling Down
- Gradual Cooling Within the Oven: After the wood achieves its target moisture content, it’s time to initiate the cooling process. Start by switching off the oven. Instead of immediately taking the wood out, let it remain inside the turned-off oven for around 30 minutes. This gradual cooling approach minimizes the risk of sudden temperature changes, which can induce stress in the wood and potentially lead to cracks or warping.
- Final Cooling at Room Temperature: Post the in-oven cooling phase, carefully remove the wood pieces and place them in a well-ventilated area at room temperature. This final cooling step allows the wood to acclimatize to the ambient environment, ensuring any residual heat dissipates evenly. It’s essential to let the wood cool down entirely before using it for any projects, as working with wood that’s still warm can lead to inconsistencies in craftsmanship.
Safety Precautions and Checks:
- Moisture Check: Always use a moisture meter to check the wood’s moisture content. Aim for a moisture content of 6-8% for indoor projects.
- Ventilation: Ensure your kitchen is well-ventilated and has a high-volume extraction fan. Drying wood can release moisture and odors.
- Safety Gear: Wear heat-resistant gloves when handling wood in the oven and remove any nails or metal contact points form the lumber before placing in the oven.
- Avoid Overloading: Don’t overload the oven with too many wood pieces. This can hinder proper air circulation and lead to uneven drying.
- Stay Attentive: Never leave the drying wood unattended. Regularly check the wood to prevent any potential fire hazards.
How Long Does It Take to Dry Wood in an Oven?
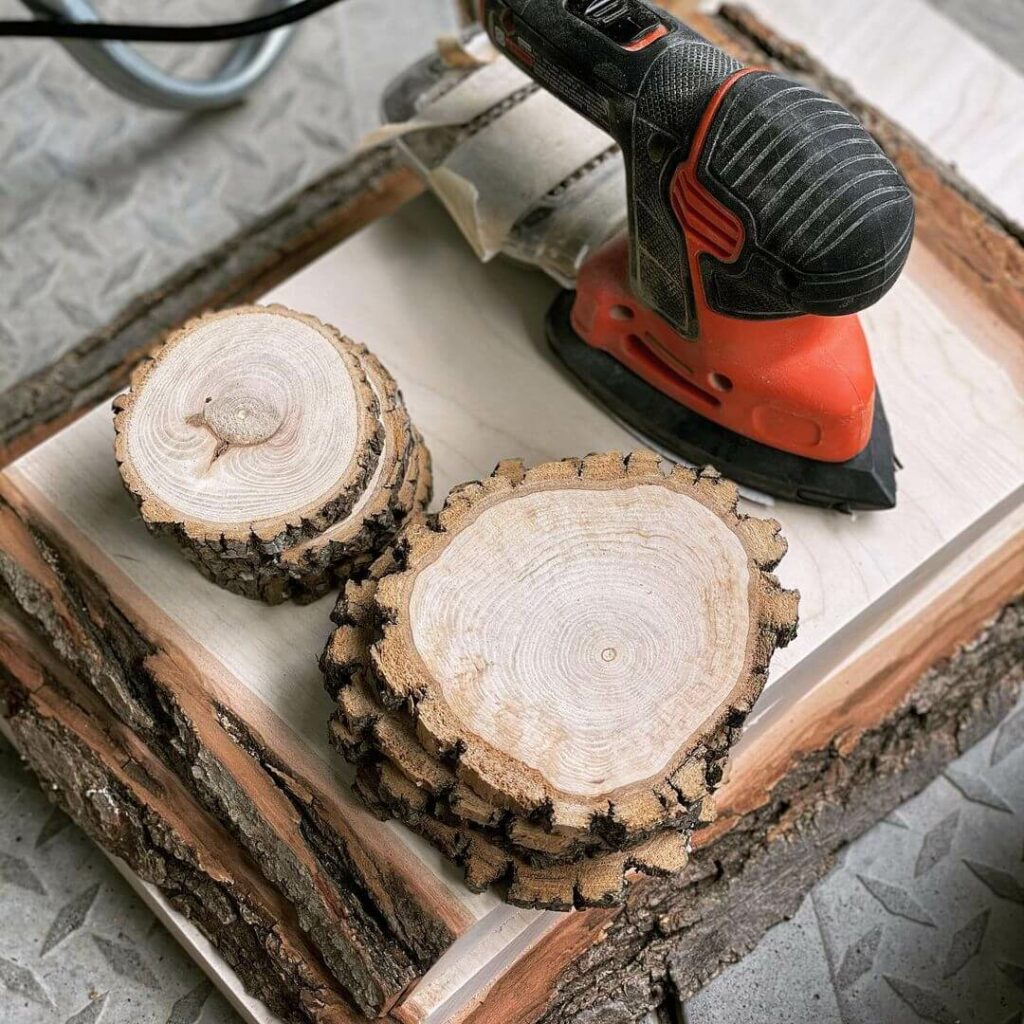
Using an oven to dry wood is a technique frequently adopted for projects that require a faster drying process, especially when working with smaller pieces like wood cookies or when making wood coasters.
This method is particularly beneficial for decorative wood burning projects where precision is paramount. However, the drying time in an oven can differ depending on several factors related to the specific project and the type of wood used.
- Thickness of the Wood: Naturally, thinner pieces of wood will dry faster than thicker ones. For instance, a thin slice might take just an hour or two, while a thicker slab could require several hours.
- Type of Wood: Different wood species have varying densities and moisture content. Hardwoods, like oak or maple, generally take longer than softwoods, such as pine or cedar.
- Initial Moisture Content: Wood that’s freshly cut or “green” has a high moisture content and will take longer to dry compared to wood that’s been air-drying for a while.
- Oven Temperature: While it’s recommended to use a low temperature (around 175°F or 80°C) to prevent warping or cracking, this gentle heat means the drying process is slower. Increasing the temperature can speed up the process but comes with the risk of damaging the wood.
- Air Circulation: Ensuring there’s space between each piece of wood and using an oven-safe rack can promote better air circulation, which can expedite the drying process.
Given these variables, it’s challenging to provide a one-size-fits-all answer. However, as a general guideline, smaller, thinner pieces of wood might take anywhere from 1 to 3 hours, while thicker pieces could require 4 to 6 hours or even longer. It’s essential to monitor the wood’s moisture content throughout the process using a moisture meter to determine when it’s adequately dried.
Drying Times for Various Woods (1-inch thickness)
| Wood Type | Oven Drying Time (approx.) | Traditional Air Drying Time (approx.) |
|---|---|---|
| Maple | 3-4 days | 4-6 months |
| Oak | 4-5 days | 6-12 months |
| Teak | 4-5 days | 6-8 months |
| Pine | 1-2 days | 2-4 months |
| Cedar | 2-3 days | 3-5 months |
| Walnut | 3-4 days | 4-6 months |
| Cherry | 2-3 days | 3-5 months |
| Ash | 3-4 days | 4-6 months |
| Mahogany | 3-4 days | 5-7 months |
| Birch | 3-4 days | 4-6 months |
| Douglas fir | 2-3 days | 3-5 months |
Note: It’s crucial to use a moisture meter to check the wood’s moisture content regularly, regardless of the drying method. The goal is typically to achieve a moisture content of 6-8% for indoor use.
What Temperature is Needed to Dry Wood?
The temperature needed to dry wood effectively is a crucial aspect of the drying process, ensuring the wood retains its structural integrity and appearance. Let’s delve into the specifics:
Optimal Temperatures for Drying Wood
- Oven Drying: When drying wood in an oven, the recommended temperature is typically around 175°F (80°C). This low, consistent temperature helps prevent the wood from cracking or warping. It’s essential to maintain this temperature and not rush the process by increasing the heat, as higher temperatures can cause the wood to dry unevenly or even burn.
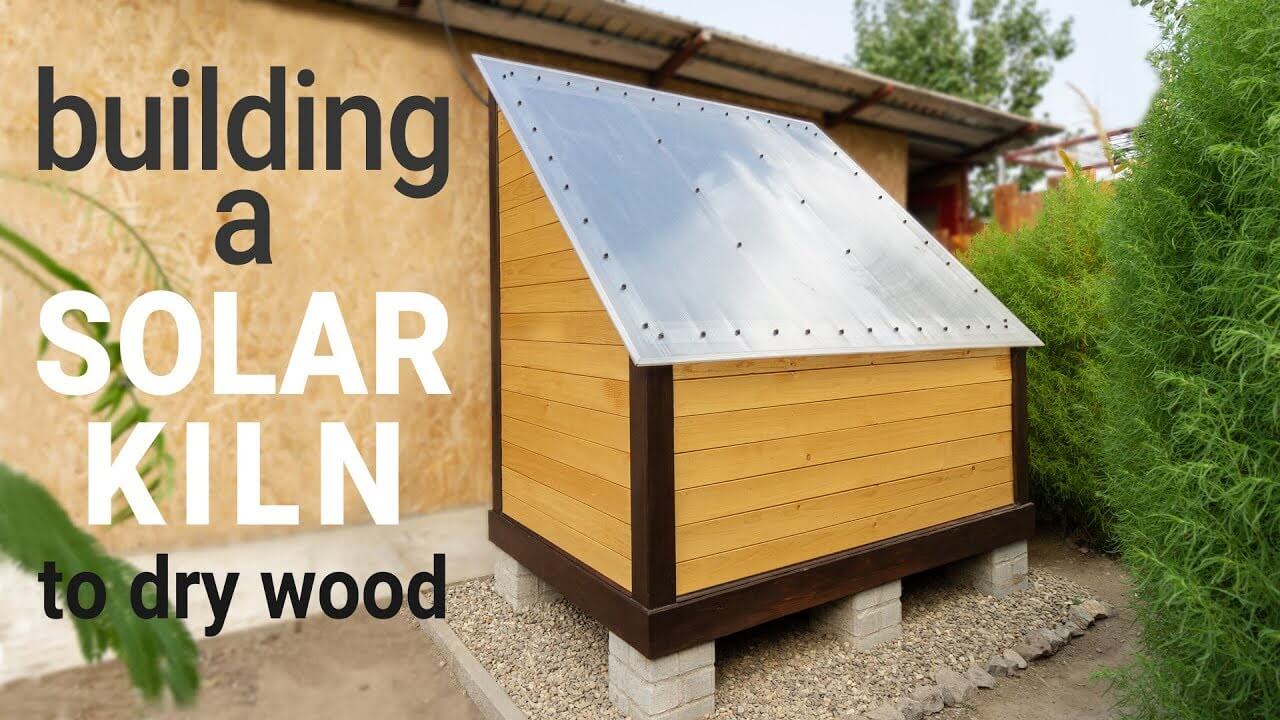
- Kiln Drying: Kiln drying is a more industrial method of drying large quantities of wood. The temperatures in a kiln can range from 180°F to 240°F (82°C to 115°C), depending on the type of wood and its initial moisture content. Softwoods generally require higher temperatures than hardwoods. The controlled environment of a kiln allows for faster drying times compared to other methods.
- Air Drying: This method relies on ambient outdoor temperatures and can vary based on the season and location. While there isn’t a specific “temperature” for air drying, it’s best done in conditions where the average temperature is between 60°F and 75°F (15°C and 24°C). However, it’s the airflow and relative humidity that play a more significant role in the air drying process than the actual temperature.
- Microwave Drying: For small wood pieces, a microwave can be used for drying. While it’s challenging to pinpoint an exact temperature, using the microwave’s defrost setting or 50% power setting for short intervals is recommended. It’s crucial to monitor the wood closely to prevent overheating.
Key Takeaways:
Homemade Wood Kiln Dehumidifier
What is a Wood Kiln Dehumidifier?
A wood kiln dehumidifier is a specialized device designed to control the humidity levels within a wood-drying kiln. Its primary purpose is to accelerate the wood drying process by extracting moisture from the air, ensuring that the wood dries evenly and at a controlled rate.
How Does It Work?
- Moisture Extraction: As the wood releases moisture during the drying process, the dehumidifier works to pull this moisture from the air. It does so by drawing in humid air, cooling it down to condense the moisture, and then reheating and releasing the now drier air back into the kiln.
- Controlled Environment: By maintaining a consistent humidity level, the dehumidifier ensures that the wood dries uniformly. This controlled environment reduces the risk of defects such as warping, cracking, or checking.
- Energy Efficiency: Unlike traditional kilns that rely on external heat sources, dehumidification kilns use the heat generated by the dehumidifier itself. This process is more energy-efficient, as it recycles the heat within the kiln.
Why Use a Wood Kiln Dehumidifier?
- Speed: One of the primary advantages is the accelerated drying time. While air drying can take months or even years, a dehumidification kiln can achieve the same results in days or weeks.
- Quality: The controlled environment ensures a higher quality of dried wood, minimizing defects and maximizing the wood’s usability.
- Versatility: These dehumidifiers can be adapted to various sizes of kilns, making them suitable for both small-scale and large-scale operations.
Steps to Make a Homemade Wood Kiln Dehumidifier
Creating a homemade wood kiln dehumidifier can be a rewarding project for woodworking enthusiasts. While commercial dehumidifiers are available, building one at home allows for customization and can be more cost-effective. Here’s a step-by-step guide to help you craft your own wood kiln dehumidifier:
Making a Homemade Wood Kiln Dehumidifier
1. Gather Materials
2. Choose a Location
Find a suitable location for your kiln, preferably a space that’s dry and free from direct sunlight. Basements or garages often work well.
3. Prepare the Kiln Chamber:
- Insulate the walls, ceiling, and floor of your chosen space to retain heat.
- Seal any gaps or openings with caulk or weather stripping to ensure the chamber is airtight.
4. Install the Dehumidifier
Place the household dehumidifier inside the kiln chamber. Ensure it’s easily accessible for maintenance and emptying the water collection tray.
5. Set Up Circulation
Install the small fan inside the kiln to ensure even air circulation. This helps in distributing the heat and prevents moisture pockets.
6. Ventilation
Install ventilation ducts at the top and bottom of the kiln chamber. Attach fans to these ducts to control airflow and help in removing moist air when needed.
7. Monitor Humidity and Temperature
Place the hygrometer and thermometer inside the kiln. Regularly check these instruments to ensure the temperature and humidity levels are optimal for wood drying for woodworking.
8. Start the Drying Process
Load your wood into the kiln, turn on the dehumidifier, and monitor the process. Adjust the settings as needed based on the readings from your hygrometer and thermometer.
Precautions:
- Safety First: Always ensure that all electrical components are safely installed to prevent any hazards.
- Regular Monitoring: Check the dehumidifier’s water collection tray regularly and empty it to ensure the device runs efficiently.
- Ventilation: Ensure proper ventilation in the kiln to prevent mold growth and ensure even drying.
- Over-drying: Be cautious not to over-dry the wood, as this can lead to cracks or warping.
Important: While building a homemade wood kiln dehumidifier requires some effort and attention to detail, the benefits of custom-dried wood are well worth it. With patience and regular monitoring, you’ll have perfectly dried wood ready for your projects in no time!
Oven Dry Wood Moisture Content
When we talk about the moisture content of wood, we’re referring to the amount of water present in the wood compared to its dry weight. The oven dry method is a standard technique used to determine this. In this method, a wood sample is weighed, dried in an oven until all moisture is removed, and then weighed again. The difference in weight gives the moisture content.
What Moisture Content Should Kiln Dried Wood Be?
Kiln drying is a controlled process used to reduce the moisture content of wood to a desired level. The ideal moisture content for kiln-dried wood varies based on its intended use. For most indoor applications, such as furniture or flooring, the desired moisture content is typically between 6% to 8%. For outdoor applications, it might be slightly higher. It’s essential to achieve the right moisture content to prevent issues like warping, shrinking, or swelling after the wood is used in its final application.
Tools and Techniques to Measure Moisture Content
- Moisture Meters: These are handheld devices that can quickly measure the moisture content of wood. There are two main types:
- Pin-type meters: These have two pins that are inserted into the wood. They measure the resistance between the pins, which changes based on the wood’s moisture content.
- Pinless meters: These use electromagnetic waves to measure moisture content without penetrating the wood’s surface.
- Oven Dry Method: As mentioned earlier, this involves weighing the wood, drying it in an oven, and then weighing it again. The difference in weight gives the moisture content.
- Calcium Carbide Method: This involves taking a sample of wood, grinding it, and then mixing it with calcium carbide. The reaction produces acetylene gas, and the amount of gas produced is proportional to the moisture content.
- Distillation Method: This involves boiling the wood in a solvent that extracts the water. The water is then condensed and measured.
- Infrared Method: This uses the principle that water absorbs specific wavelengths of infrared light. By shining infrared light on a wood sample and measuring the amount absorbed, the moisture content can be determined.
Note: For your woodworking project, ensure your wood’s moisture content is right, whether it’s oven-dried or kiln-dried. Use tools like moisture meters for accuracy. Remember, considering the wood’s final use can greatly impact the quality and durability of your work.
 KOEKA Wood Moisture Meter (Pinless-colors)
- Pinless Design: This meter uses a non-invasive method to measure moisture, ensuring no damage to your wood surfaces
- Colorful LED Display: The vibrant display provides clear readings, making it easy to understand the moisture levels at a glance.
- Wide Measurement Range: With a range of 4% to 80%, this device can be used on various wood types, offering versatility.
- Automatic Temperature Compensation: This feature ensures accurate readings by adjusting for temperature variations, giving you reliable results every time.
- Non-invasive measurement preserves wood
- Bright LED display enhances readability
- Suitable for testing diverse wood types
- Temperature compensation boosts accuracy
- Durable and user-friendly design features
- Requires periodic calibration for accuracy
- Might be slightly pricey for occasional users
Drying Green Wood in Oven
Green wood, often referred to as “fresh-cut” or “unseasoned” wood, is wood that has been recently cut and contains a high moisture content. Drying green wood is essential for woodworking projects to prevent issues like warping, cracking, or fungal growth. Using an oven to dry green wood is a method that can expedite the drying process, but it comes with its own set of challenges and considerations.
Challenges with Drying Green Wood:
- High Moisture Content: Green wood can have a moisture content as high as 80%. This high moisture level can make the drying process longer and more energy-intensive.
- Risk of Cracking: Rapid drying can cause the wood to crack. This is especially true if the outer layers dry faster than the inner layers, creating tension within the wood.
- Warping: Uneven drying can lead to warping, where the wood bends or twists out of shape.
- Fungal Growth: If not dried properly, the moisture in green wood can lead to fungal growth, which can compromise the wood’s integrity and appearance.
- Energy Consumption: Drying green wood in an oven can be energy-intensive, especially if the wood is very wet to begin with.
Tips for Successful Drying:
- Gradual Heating: Start with a low oven temperature and gradually increase it. This helps in reducing the risk of cracking and warping.
- Monitor Moisture Content: Use a moisture meter to regularly check the wood’s moisture content. Aim for a moisture content of 6-8% for most indoor woodworking projects.
- Ensure Proper Air Circulation: Place the wood pieces in the oven in a way that allows for proper air circulation around each piece. This ensures even drying.
- Rotate the Wood: Every so often, rotate the wood pieces to promote even drying.
- Patience is Key: While the oven method is faster than air drying, it’s essential to be patient and not rush the process. Rapid drying can compromise the wood’s quality.
- Safety First: Always be cautious when using an oven for drying wood. Ensure the oven is in good working condition, and never leave it unattended.
Tip: While drying green wood in an oven can be a faster method than traditional air drying, it’s essential to be aware of the challenges and take the necessary precautions. With careful monitoring and the right techniques, you can achieve perfectly dried wood that’s ready for your next project.
Special Considerations for Oven Drying Wood
Drying Wood in Oven to Kill Bugs
When it comes to woodworking, ensuring that your wood is free from pests is crucial. Bugs and larvae can compromise the integrity of the wood, leading to structural weaknesses and unsightly holes or tunnels. Moreover, if left untreated, these pests can spread to other wood items or structures in your home, causing even more damage.
Why It’s Essential to Kill Bugs in Wood
- Structural Integrity: Bugs, especially wood-boring insects like termites and beetles, can weaken the wood from the inside out. Over time, this can lead to structural failures in furniture or other wooden structures.
- Aesthetic Reasons: No one wants to see tiny holes or tunnels in their finished woodworking project. It detracts from the beauty of the piece and indicates a lack of quality.
- Prevent Further Infestation: If bugs are present in one piece of wood, there’s a risk they could spread to other wooden items or structures in your vicinity. By ensuring your wood is bug-free, you’re also protecting your other possessions.
- Safety: Some wood pests can be harmful. For instance, certain types of beetles can cause allergic reactions in some people. By eliminating these pests, you’re ensuring the safety of anyone who comes into contact with your wood.
How Long to Bake Wood to Kill Bugs
To effectively kill bugs in wood, the wood needs to be heated to a core temperature of at least 140°F (60°C) and maintained at that temperature for at least 60 minutes. This ensures that the heat penetrates deep into the wood, killing any bugs or larvae present. It’s essential to use an oven thermometer to monitor the temperature accurately and ensure it remains consistent throughout the drying process.
Precautions:
Note: Oven-drying wood is an effective method to kill bugs, it’s essential to do it correctly to maintain the quality of the wood. Always monitor the temperature and moisture content, and take necessary precautions to ensure safety.
Alternative Wood Drying Methods
Both woodworking enthusiasts and professionals frequently look for alternative methods to dry wood, particularly when using a traditional kiln isn’t an option. Below are some recommended alternatives for drying lumber for your DIY projects, or for safely storing seasoned wood in your firewood rack as the colder months approach.
Drying Wood in Microwave
Microwaving wood is a method that’s gained traction over the years, primarily due to its speed and convenience.
Microwave Wood Dry: Benefits and Challenges
Benefits:
- Speed: One of the most significant advantages of using a microwave to dry wood is the speed. It can dry small pieces of wood in a fraction of the time compared to traditional methods.
- Convenience: For hobbyists or those without access to a kiln, a microwave offers a readily available alternative.
- Control: With a microwave, you can control the drying process more minutely by adjusting the power and time settings.
Challenges:
- Size Limitations: Microwaves can only accommodate smaller pieces of wood and should only be considered for little sectional pieces.
- Risk of Over-Drying: Without careful monitoring, there’s a risk of over-drying the wood, leading to cracks.
- Uneven Drying: Microwaves might not dry wood uniformly, leading to moisture pockets in some areas.
Drying Wood Without a Kiln
Not having access to a kiln doesn’t mean you can’t dry wood effectively. There are several methods available, each with its own set of advantages and challenges.
Air Drying Outdoors: Benefits and Challenges
Benefits:
- Natural Process: Air drying is a completely natural process that doesn’t require any energy input.
- Cost-Effective: It’s a cost-effective method, especially for larger quantities of wood.
- Improves Wood Quality: Slow drying outdoors can enhance certain wood properties, making it more stable.
Challenges:
- Time-Consuming: Depending on the climate and wood type, air drying can take several months to years.
- Risk of Decay: Wood left outside is susceptible to fungal decay and insect attacks.
- Weather Dependency: The drying process is heavily dependent on weather conditions.
Air Drying Wood Indoors
Drying wood indoors is another alternative, especially in regions where outdoor conditions aren’t favorable.
Air Drying Indoors: Benefits and Challenges
Benefits:
- Controlled Environment: Drying indoors offers a more controlled environment, protecting the wood from sudden weather changes.
- Less Risk of Decay: The chances of fungal or insect attacks are reduced indoors.
- Space-Efficient: For those with limited outdoor space, indoor drying can be a viable option.
Challenges:
- Slower than Outdoor Drying: Without the direct influence of the sun, indoor drying can be slower.
- Requires Ventilation: Proper ventilation is crucial to prevent moisture buildup indoors.
- Space Limitations: Depending on the indoor space available, you might be limited in the quantity of wood you can dry at once.
In all these methods, it’s essential to monitor the wood regularly and ensure it’s drying evenly. Using tools like moisture meters can help in tracking the drying process and ensuring the wood is ready for use. Remember, the goal is to achieve wood with a consistent moisture content that’s suitable for its intended purpose.
In Conclusion
Mastering the art of drying wood, especially when preparing materials like wood for bed frames, is a blend of precision and patience. Each method, from oven drying to air drying, enriches your woodworking skills, ensuring your projects, large or small, stand the test of time.
Key Takeaways:
Remember, the journey from raw lumber to a polished bed frame is filled with learning and craftsmanship. Embrace each step of the drying process, and watch as your wood transforms into durable, beautifully crafted pieces ready for your creative touch.

