

A DIY bar table is the centrepiece of any man cave or shed bar. Get it right and the whole space clicks into place — it becomes the spot where people actually gather. Get it wrong and you end up with something wobbly that you're embarrassed to put drinks on.
The good news is that four build types cover every budget and skill level, from free pallet wood through to a live-edge slab. This guide compares all four, then walks through the most popular starting point for most builders: the pipe-and-lumber bar table.
| Bar Table Type | MaterialRecommended | Skill Level | Cost | Best For |
|---|---|---|---|---|
| Pallet bar | Reclaimed pallets | Beginner | $50–$150 | Rustic outdoor spaces |
| Pipe and lumber | Black pipe + 2×10 boards | Beginner | $100–$250 | Industrial look, garage/shed bars |
| Plywood build | 3/4" plywood, hardwood trim | Intermediate | $150–$400 | Clean finish, indoor bars |
| Reclaimed wood slab | Live edge slab | Intermediate | $300–$800 | Premium rustic look |
Why Pipe-and-Lumber Is the Best Starting Point
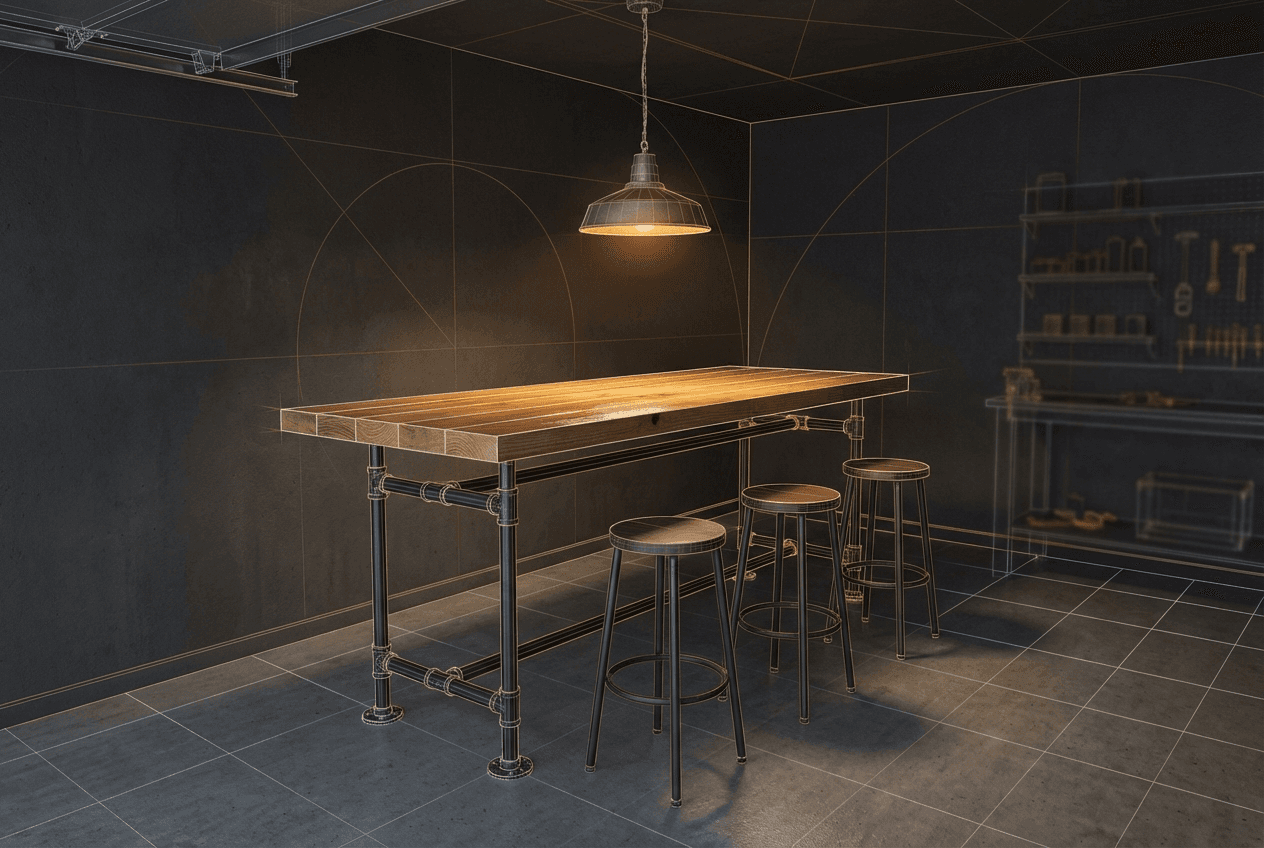
The pipe-and-lumber bar is the recommended first build for most people. Black iron pipe is available at any hardware store, arrives pre-threaded, and can be assembled without welding or special tools — just a pipe wrench and some patience. The industrial aesthetic works in virtually every garage, basement, or shed setting. And because the pipe frame is modular, you can adjust height, add shelving, or extend the bar later without starting from scratch.
A 2×10 or 2×12 lumber top is forgiving to work with: it sands easily, takes stain or epoxy well, and is cheap enough that a mistake on the first board is not a disaster. The total build can realistically be completed in a weekend.
Build a Pipe-and-Lumber Bar Table — Step by Step

Tools and Materials for a Pipe-and-Lumber Bar
| Tool / Item | Use | Est. Cost | Priority |
|---|---|---|---|
| Black iron pipe + fittings | Frame and legs | $60–$120 | Essential |
| 2×10 lumber (6–8 ft) | Bar top surface | $30–$60 | Essential |
| Pipe floor flanges | Attach top to frame | $15–$30 | Essential |
| Polyurethane or bar-top epoxy | Protective finish | $20–$80 | Essential |
| Pipe wrench | Assembling threaded pipe | $15–$30 | Essential |
| Drill + bits | Pilot holes and flange screws | $30–$80 | Essential |
| Router with round-over bit | Edge finishing | $50–$150 | Recommended |
| Belt sander | Fast initial sanding | $40–$100 | Recommended |
| Random-orbit sander | Final sanding passes | $30–$70 | Recommended |
| Thread seal tape | Sealing pipe joints | $3–$5 | Recommended |
Finishing: Epoxy vs Polyurethane
For a bar surface, finish matters more than on most projects — drinks get spilled, glasses drag across the surface, and heat from mugs cycles repeatedly. Bar-top epoxy is the premium choice: it self-levels, cures to a thick glass-like surface, and is virtually waterproof. A two-part epoxy pour takes about 24 hours to cure fully, and the result needs almost no sanding between coats because it self-levels. The trade-off is cost (a quality bar-top epoxy kit runs $40–$80) and the fact that repairs require sanding back to bare wood and re-pouring.
Polyurethane is the practical alternative. Water-based polyurethane dries clear, low-odour, and in 2 hours between coats. Apply a minimum of three coats — two will look good initially but won't hold up to regular bar use. Sand lightly with 400-grit wet-dry paper between coats to knock back dust nibs. The final coat should go on without sanding for the smoothest result. Wipe down with a tack cloth between every pass. A properly finished lumber top with three coats of oil-based polyurethane will outlast most furniture store bar tables.
What to Do Next
Once you know your build, you need to know where it fits. Use the garage designer to plan your bar layout — wall space, stool clearance, and how the bar table sits relative to seating and storage.
Browse more ideas in the man cave guide.
For inspiration on how a bar table anchors a larger bar zone — including back bar shelving, kegerator placement, and stool arrangements — see the man cave bar ideas guide. If you're planning to build in a basement rather than a garage or shed, the basement bar ideas guide covers layout configurations and the plumbing decisions that affect where you position the bar table in the room.