
What Actually Changes in a Good Garage Makeover
Before photos have two things in common: floor-level storage and no lighting. Everything is on the floor or leaning against walls because there's no system to do anything else.
After photos that hold up — that still look like the after photo a year later — have one thing in common: a zone system that makes it easy to put things back in the right place. The ones that revert to before status within six months skipped the zone planning and went straight to buying storage products.
This guide walks through six real transformation types, what changed structurally, and the decisions that made each one stick.
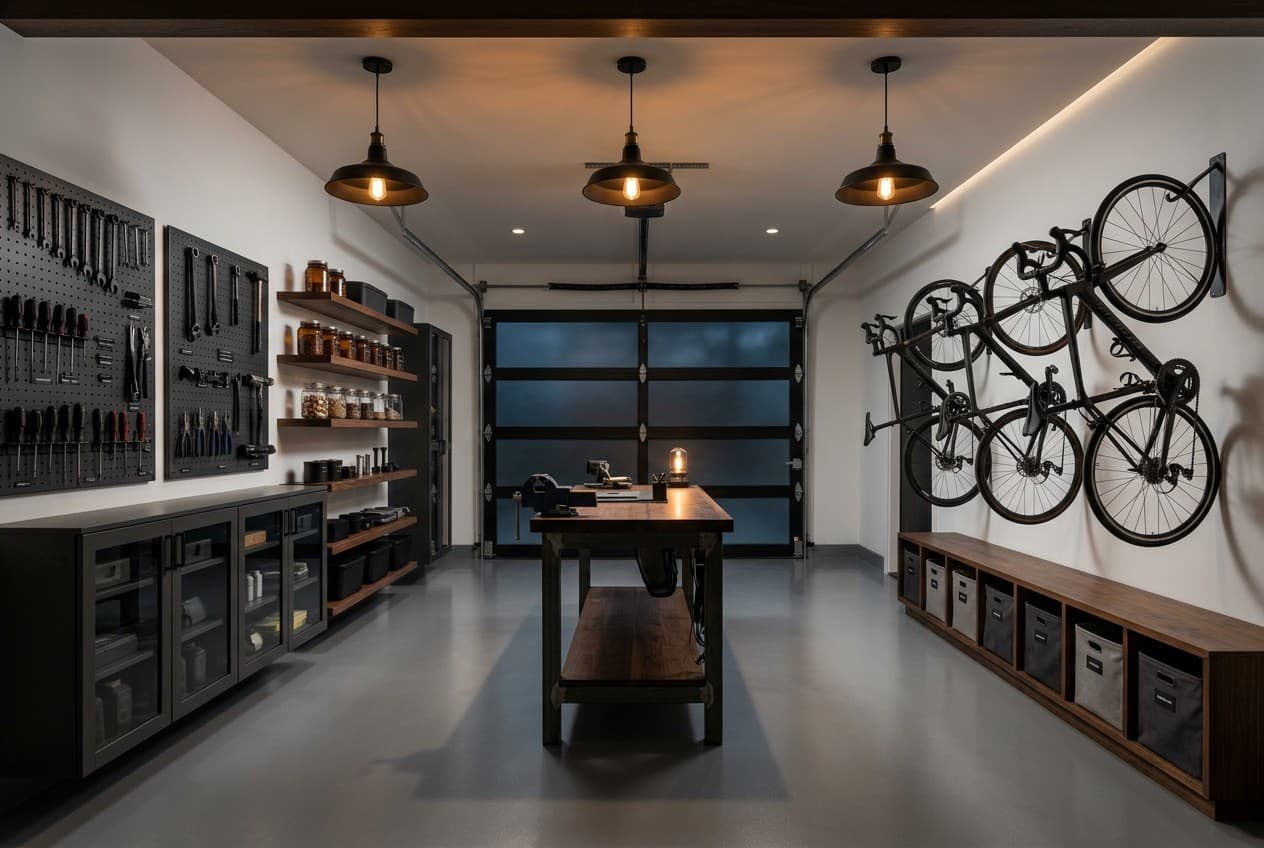
Transformation 1: Chaos to Organised Storage
Before: Car parked outside permanently. Floor covered with sporting equipment, tools, seasonal items, and boxes. Workbench buried under items placed there "temporarily" years ago.
After: Car back inside. Everything off the floor. Wall systems for tools and frequent-access gear. Overhead rack for seasonal items. Workbench clear and usable.
The key decision: purging before installing storage. Everything that hadn't been touched in 12 months left the garage before a single hook went into the wall.
What changed:
- Back wall: slatwall system with hooks and bins
- Ceiling: 4×8 overhead rack
- Workbench: cleared and organised with pegboard above
- Floor: interlocking tiles (covers staining and makes the space feel finished)

Storage Makeover Budget
- Heavy-duty wall shelves × 4
- Basic overhead rack
- Pegboard + hooks
- Bin and label system
- Slatwall back wall
- Overhead rack + bike hoists
- Steel cabinet × 1
- Interlocking floor tiles
- Modular cabinet system
- Full ceiling rack system
- Epoxy or polyurea floor
- LED shop lighting
Transformation 2: Unused Garage to Home Workshop
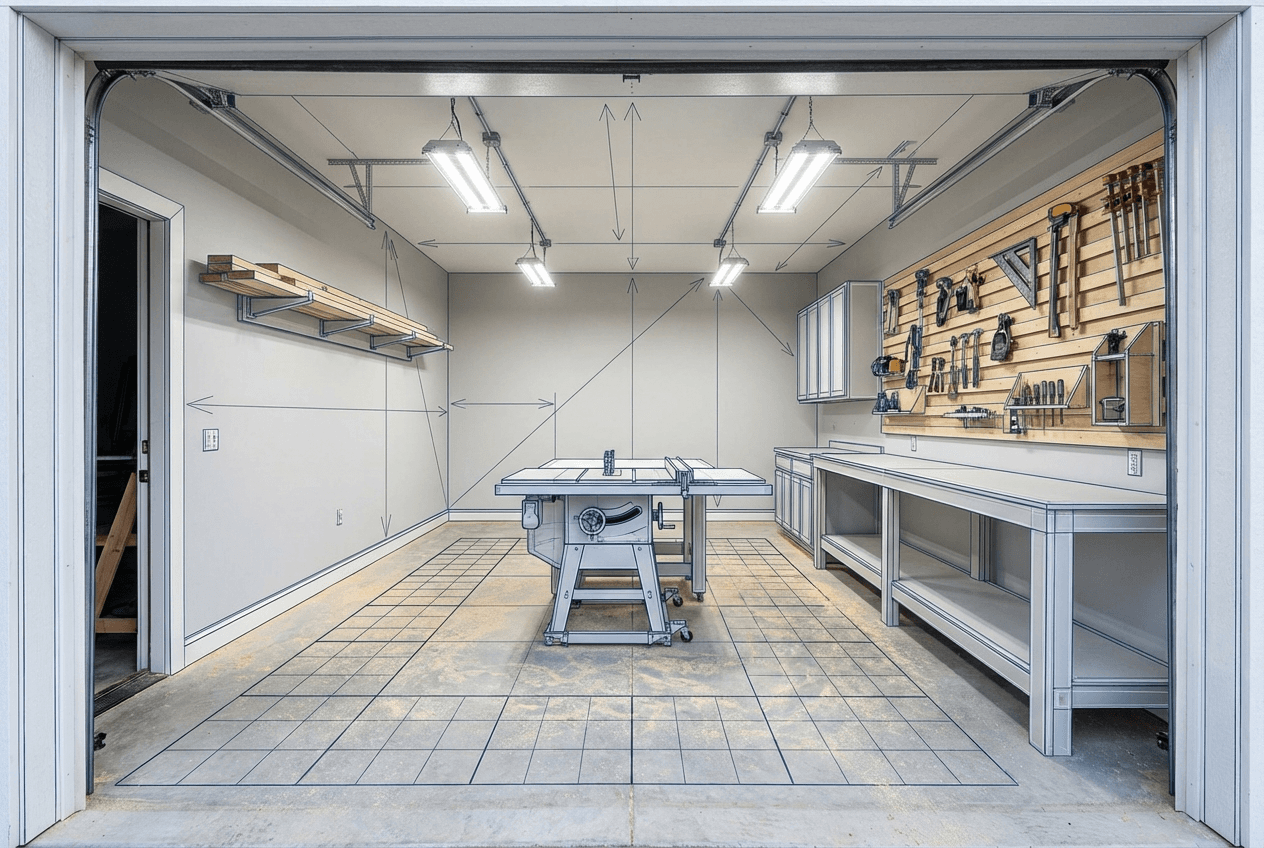
Before: single-car garage used as overflow storage. No workbench. Single overhead light bulb. No dedicated circuits.
After: full woodworking workshop with table saw, workbench, French cleat wall, lumber storage, and proper lighting. Car moved to driveway permanently.
The key decision: accepting that the car lives outside. Once that decision was made, the entire floor plan opened up and the table saw could go in the center (its correct position for outfeed clearance).
What changed:
- Floor: cleared and sealed concrete (no tiles — easier to sweep sawdust)
- Back wall: floor-to-ceiling French cleat
- Side wall: horizontal lumber rack
- Center floor: contractor table saw on mobile base
- Electrical: two 20A circuits added (one for the table saw, one for general workshop)
- Lighting: four 4,000-lumen LED shop lights
See the Small Garage Workshop Layout guide for detailed layout plans and clearance dimensions.
Transformation 3: Garage to Home Gym
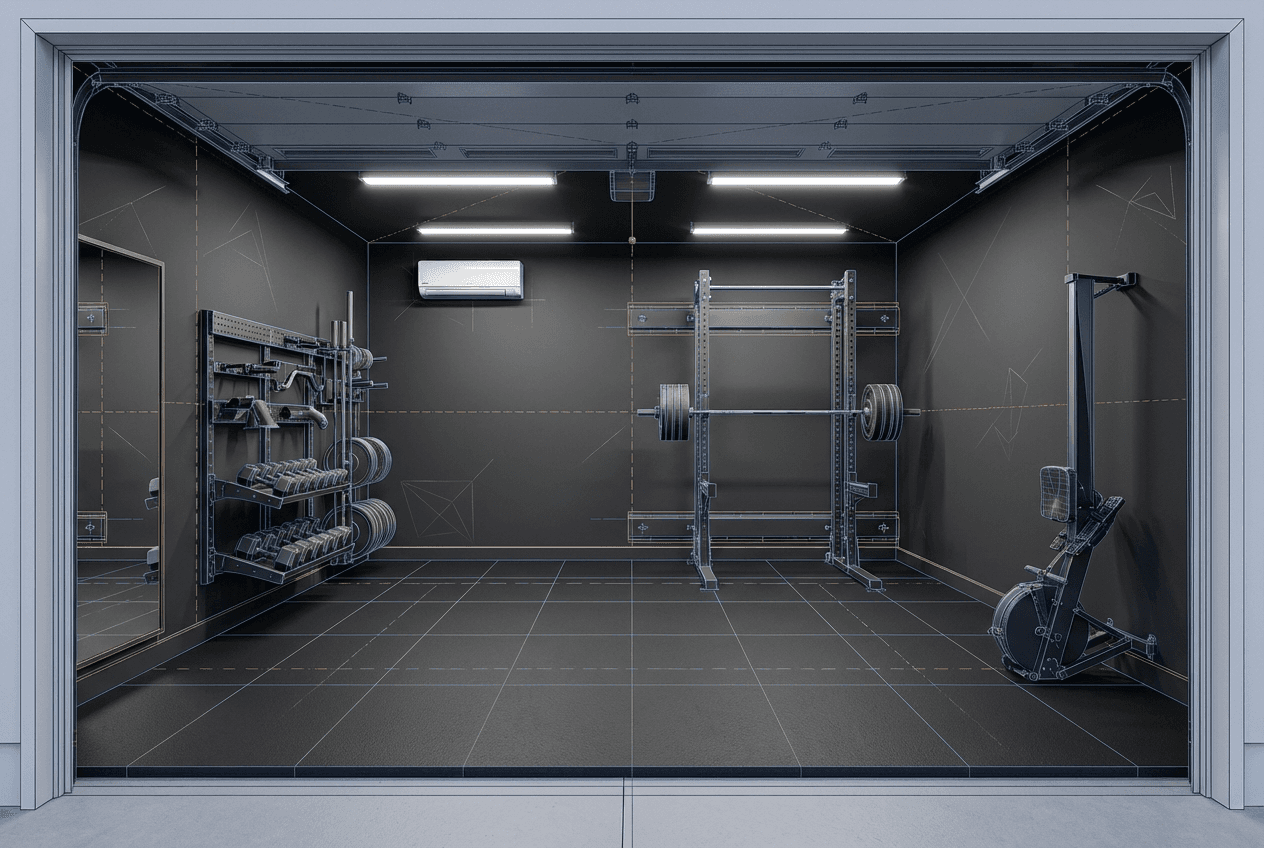
Before: 2-car garage with one bay used for storage, one bay unused except for the occasional parking.
After: full home gym with power rack, rubber floor, rower, and functional floor space. One bay remains for the car.
The key decision: rubber flooring first. The temptation is to buy equipment first and floor it later. The right order is floor → rack → everything else.
What changed:
- Full floor: 3/4-inch interlocking rubber tiles
- Back wall: power rack (bolted to wall stud for lateral stability)
- Side wall: storage for plates, dumbbells, and accessories
- Cardio corner: rower stored vertically when not in use
- Climate: mini-split (the most important upgrade for year-round use)
See the Garage Gym Ideas guide for full equipment lists and layout plans.
Transformation 4: 1-Car Garage to Man Cave

Before: 1-car garage, car outside, floor storage, single overhead light.
After: fully insulated, drywalled man cave with 75-inch TV, sectional sofa, bar cart, and game area. Not used for cars.
The key decision: insulation before everything else. A man cave in an uninsulated garage is used four months a year. The insulation + HVAC investment (about $3,500 total) is what makes it a year-round room rather than a seasonal project.
What changed:
- Walls + ceiling: R-13 batts, drywall, paint
- HVAC: ductless mini-split
- Floor: interlocking tiles (warmer underfoot than concrete)
- Back wall: TV mount, A/V components, shelving
- Side wall: bar cart position, mini fridge
- Lighting: LED strips behind TV, overhead dimmer
See the Garage Man Cave Ideas guide for layouts and full budget tiers.
Transformation 5: Attached Garage to She Shed / Studio
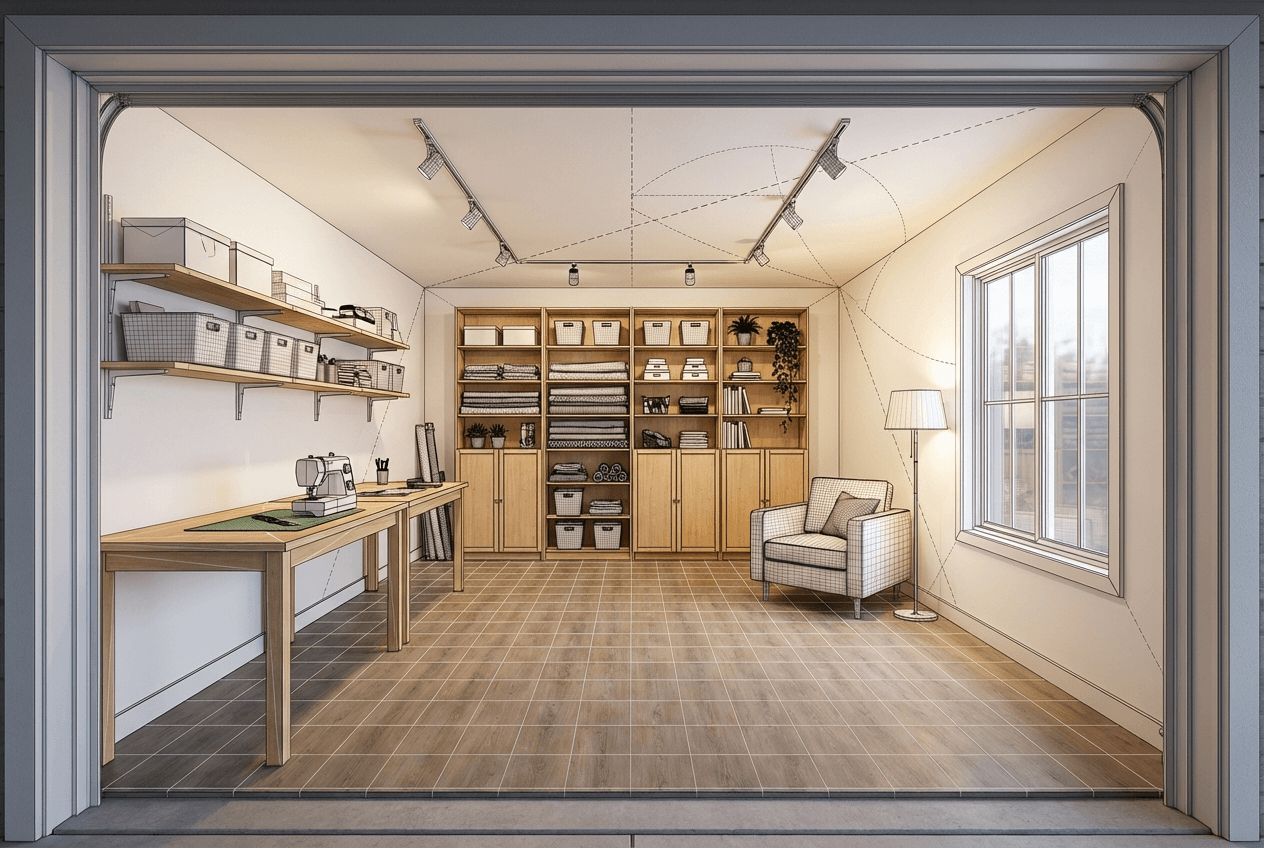
Before: attached 1-car garage, car in driveway, used as laundry overflow and general storage.
After: craft studio and personal retreat. Sewing table, storage wall, reading chair, soft lighting. Fully insulated and climate-controlled.
The key decision: keeping it single-purpose. The temptation was to include a workspace, a guest bed fold-out, and a yoga area. The transformation only worked because one use — crafting and reading — drove every decision.
What changed:
- Walls + ceiling: insulated and drywalled
- Floor: luxury vinyl plank over foam underlayment (warm, quiet, easy to clean)
- Custom storage wall: IKEA shelving built-in (KALLAX + PAX combination)
- Lighting: overhead track lighting + warm table lamp at the reading chair
- Window: new double-glazed window for natural light (where code allowed)
Transformation 6: Detached Garage to Home Office

Before: detached 2-car garage, general storage, no electrical except a single outlet off an extension cord.
After: professional home office with dedicated circuit, ethernet from the house, insulated and HVAC-equipped, proper lighting and ergonomic workspace.
The key decision: running ethernet from the house in conduit before any interior finish was done. Doing it after drywall meant cutting and patching — a $400 mistake.
What changed:
- Full insulation + vapour barrier
- Sub-panel (60A) from main house panel
- Ethernet in conduit (buried trench, 60 ft run)
- Mini-split
- LVP flooring
- Standing desk + monitor arm + ergonomic chair
See the Shed Office Ideas guide for full shed office layouts and connectivity planning.
The Planning Framework Behind Every Transformation
Every successful transformation follows the same sequence:
- Choose a single primary use
- Define zones before purchasing anything
- Complete structural work first (insulation, electrical, HVAC)
- Floor the space
- Install fixed storage and fixtures
- Bring in furniture and equipment
- Add finishing details and lighting
The ones that fail invert this sequence — they buy the sofa, then wonder why the room feels wrong.
Related Guides
- Garage Makeover Cost Guide — phased budget breakdown for every transformation type
- Garage Makeover Ideas — zone plans and transformation concepts
- Garage Flooring Ideas Compared — which floor is right for which transformation
- Garage Makeover Hub: Complete Guide — full planning resource
Use the AI Garage Designer to get a personalised transformation plan for your specific garage — zone layout, phase sequence, and budget anchors based on your space and goals.