
Most sheds are built for storage — open stud walls, no insulation, no power, concrete or dirt floor. Making one truly livable means addressing five systems in the right order. The order matters: if you run electrical before you insulate, you'll be fishing wires through insulated stud bays later. If you install flooring before HVAC, you risk moisture damage before you've moved a single piece of furniture in. Get the sequence right and each step builds cleanly on the last.
This guide covers every system a shed needs to function as a year-round office, studio, or guest room — from foundation prep through interior finishing. Costs are based on 2026 material pricing for a standard 12×16 ft shed.
How to Make a Shed Livable — Step by Step
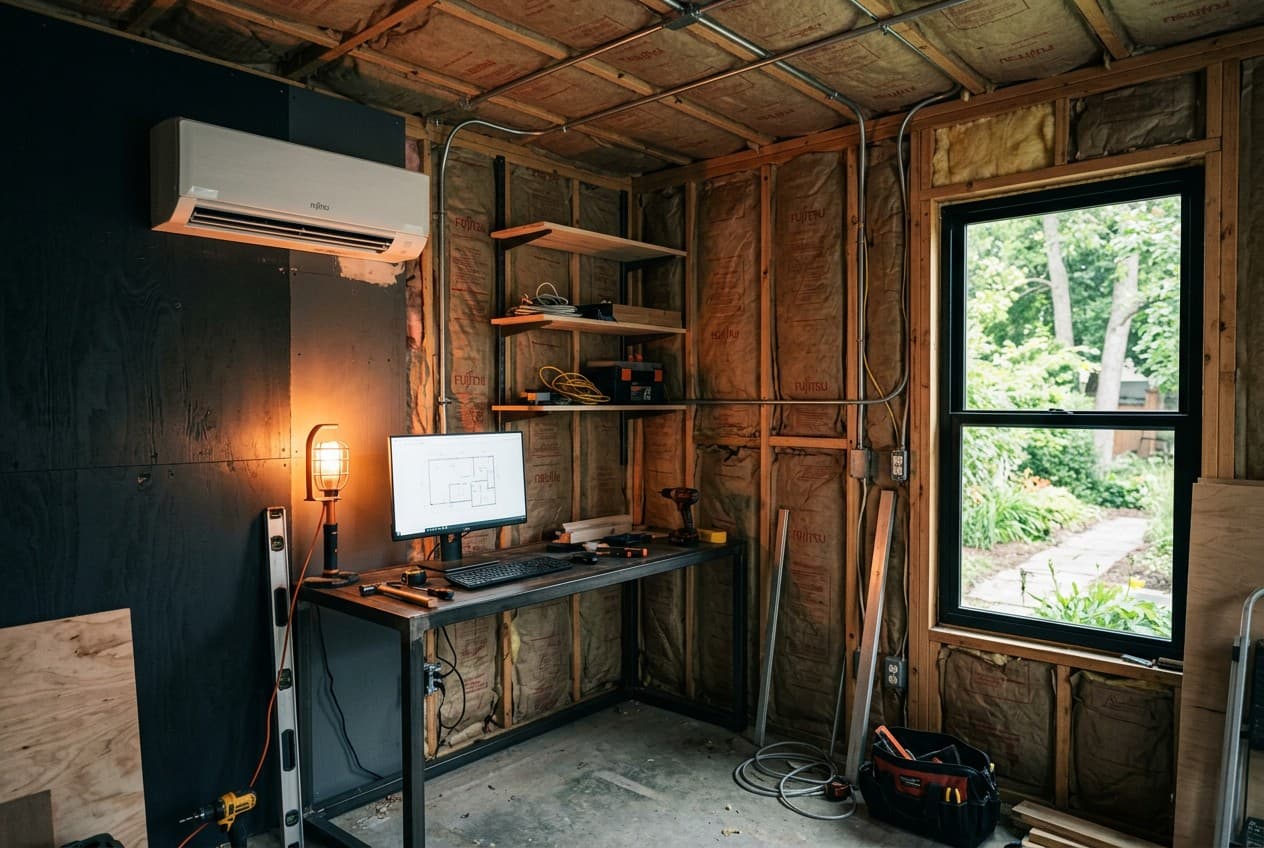
Choosing the Right HVAC System
The heating and cooling system is often the biggest single cost in a shed conversion — and the decision you'll live with most directly. The four realistic options for a 12×16 ft shed are compared below.
| System | Cost InstalledRecommended | Heating | Cooling | Best For |
|---|---|---|---|---|
| Mini-split (ductless AC) | $700–$2,000 | Yes | Yes | Year-round use sheds |
| Electric baseboard heater | $100–$400 | Yes | No | Cold-climate heating only |
| Portable AC + fan | $200–$500 | Fan only | Yes | Summer-only use |
| Propane heater (vented) | $150–$400 | Yes | No | Off-grid or no-electric sheds |
The mini-split is the clear choice if your shed will be used in winter and summer. The upfront cost is higher, but it's the only single system that provides both heating and cooling, runs efficiently at partial load, and installs through a single small wall penetration. Brands like Senville, Pioneer, and Mitsubishi all make units sized appropriately for a 200 sq ft shed space.
What Does a Shed Conversion Actually Cost?
The chart below shows typical costs for each upgrade system in a 12×16 ft shed. These are 2026 contractor-installed prices; DIY installation reduces most line items by 40–60%.
Shed Livability Upgrade Costs
Total costs for a fully converted 12×16 shed typically run $4,000–$8,000 with a professional doing the skilled work (electrical, HVAC) and the owner handling insulation, drywall, and flooring. A full DIY approach can bring this under $3,000.
The Electrical Step: What Most DIYers Underestimate
Electrical is the step where shed conversions most often go wrong — either because it's done illegally without a permit, or because the circuit is too small for how the space ends up being used. A single 15-amp circuit fed from the house panel is fine for a basic garden shed with a light and one outlet. It is not sufficient for a shed with a mini-split, a space heater backup, a computer, monitors, and task lighting running simultaneously.
The right approach is a dedicated subpanel in the shed — typically 60 amps fed through a buried cable or conduit from the main house panel. The subpanel then distributes separate 15-amp and 20-amp circuits to lighting, general outlets, and the HVAC unit. This gives you room to grow and eliminates the risk of nuisance tripping. Budget for a licensed electrician to make the connection at both the main panel and the shed subpanel. The underground cable run and the interior circuit wiring are tasks a confident DIYer can handle; the panel work is where the risk is and where a professional is genuinely worth the cost.
Frequently Asked Questions
Do I need planning permission to convert a shed?
In most jurisdictions, a shed used as a home office or studio does not require planning permission provided it stays within permitted development rules — typically a maximum height, a setback from boundary fences, and a floor area limit (often 30 sq m in the UK, or whatever your local zoning allows). Electrical work almost always requires a permit and inspection regardless of what the shed is used for. Check with your local building department before you start; the permit process is straightforward and protects your home's resale value.
What R-value do I need for a shed office?
For walls, R-13 (standard 3.5-inch fiberglass batt in a 2×4 stud bay) is the practical minimum for year-round use in most climates. In cold climates (Zone 5 and above), aim for R-15 using high-density batts or adding rigid foam over the studs. For the ceiling, R-19 is the minimum; R-30 is better and achievable in most shed roof structures. Don't bother with expensive insulation upgrades if you haven't first sealed air leaks — a well-sealed R-13 wall outperforms a leaky R-21 wall every time.
Can I heat a shed cheaply?
The cheapest upfront option is a 1,500W electric space heater (~$40–$80), but running cost is high — roughly $0.18–$0.22 per hour at average US electricity rates. For a shed you use daily in winter, a mini-split is dramatically cheaper to run (it moves heat rather than generating it, achieving 2–4x efficiency). If the shed has no electrical connection, a vented propane heater is the most affordable self-contained solution. Whatever you choose, proper insulation is always the cheapest "heater" — it reduces the load on everything else.
What to Do Next
Before you buy materials or book a contractor, use the garage designer to lay out your shed conversion — dimensions, door placement, electrical layout, and HVAC positioning all affect how the finished space works.
For more ideas on how to use a converted shed, see our shed office ideas and layouts.
For a deeper look at HVAC sizing and insulation specifications specific to shed offices, shed office insulation and HVAC covers the detail that this guide summarises. Once the infrastructure is in place, how to convert a shed to an office walks through the finishing steps — layout, lighting, and furniture — that complete the transformation. If the shed is intended as a she-shed rather than an office, the she-shed insulation guide addresses the comfort and interior finish standards that matter most when livability is the primary goal.