
More workshop injuries involve angle grinders than almost any other power tool — not because grinders are poorly designed, but because they are routinely used with the wrong disc, at the wrong speed, without adequate face protection. An abrasive disc shattering at 12,000 RPM sends fragments faster than any reaction time can account for.
This guide covers the six disc types you need to understand, a step-by-step process for safe concrete smoothing, the non-negotiable safety specifications, and what to look for when buying a grinder for general workshop use.
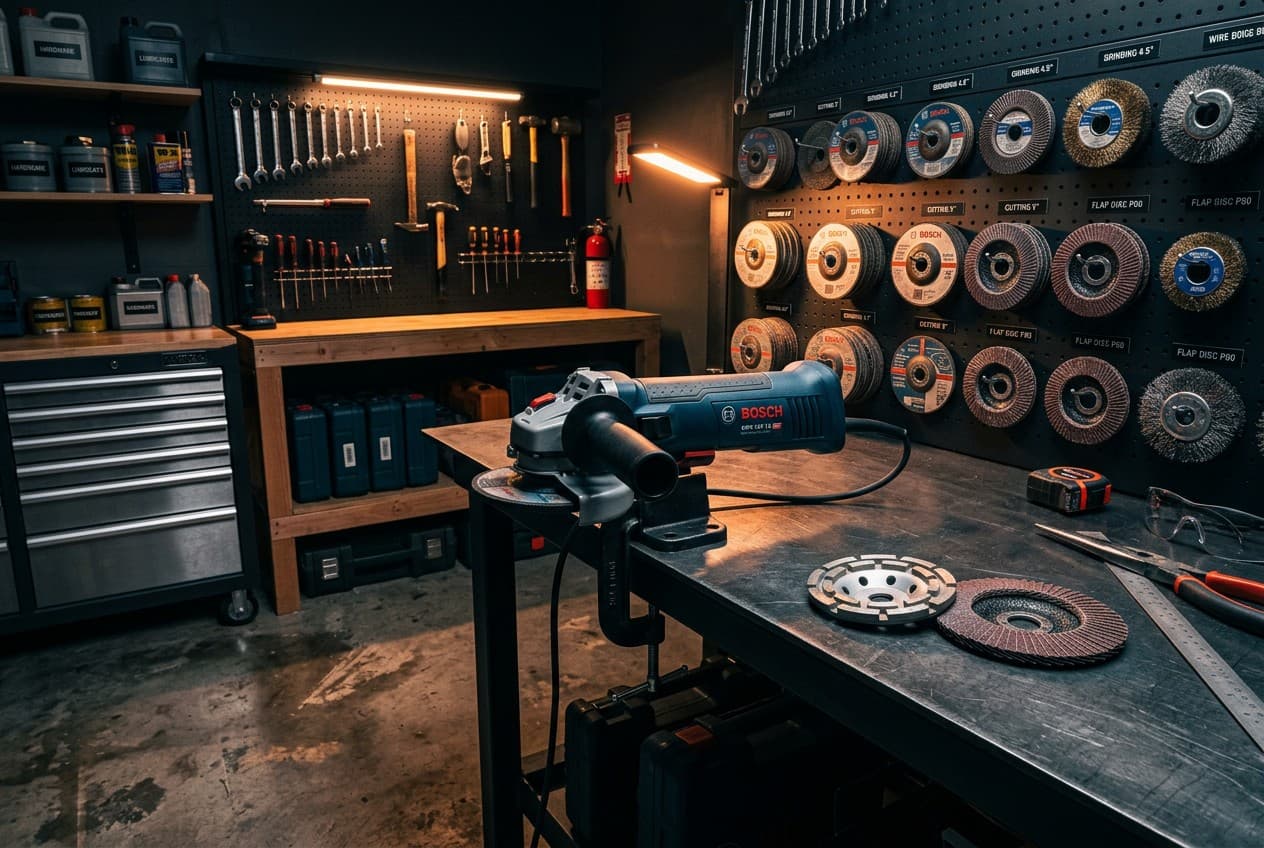
Disc Types: What to Use and When
The disc determines what an angle grinder can safely do. Using the wrong disc — even briefly — is where most serious accidents start. The table below covers the six disc types a workshop grinder user will encounter.
| Disc Type | TaskRecommended | Material | Grit / RPM Note | Safety Note |
|---|---|---|---|---|
| Grinding Disc | Metal removal, weld flush, shaping | Steel, iron, stainless | Coarse grit — run at full grinder RPM | Never use on wood; disc must meet or exceed grinder RPM rating |
| Cutting Disc | Straight cuts through metal, rebar, pipe | Ferrous and non-ferrous metal | Thin profile — do not side-grind | Side pressure will shatter a cutting disc; use grinding disc if side loading is needed |
| Flap Disc | Blending welds, surface finishing, light material removal | Steel, aluminum, painted surfaces | 40–120 grit depending on finish needed | Safer profile than rigid discs; still requires face shield and guard in place |
| Wire Cup Brush | Rust removal, paint stripping, surface cleaning | Steel, cast iron, masonry | No grit rating — speed rated by RPM | Flying wire fragments are a severe eye hazard; full face shield mandatory |
| Polishing Pad | Surface buffing, paint correction, metal finishing | Metal, painted surfaces | Low RPM — check pad's maximum RPM | Do not exceed pad's rated speed; heat buildup at high RPM degrades pad and finish |
| Diamond Blade | Cutting tile, stone, concrete, masonry | Ceramic tile, brick, concrete, stone | Continuous or segmented rim — check application | Generates silica dust; P100 respirator and dust shroud required for concrete work |
Safe Concrete Smoothing: Step by Step
Smoothing concrete with a diamond cup wheel — to remove old coatings, adhesive, thinset, or uneven high spots — is one of the angle grinder's most practical applications. It is also the task most commonly done without adequate dust protection. Crystalline silica dust from concrete grinding is a lung carcinogen. A P100 half-face respirator is not optional for this work.
Concrete Smoothing With an Angle Grinder — Step by Step
Safety Specifications
Minimum PPE and workspace requirements for safe grinder operation — non-negotiable before any use
Choosing an Angle Grinder for Workshop Use
For most workshop tasks — cutting metal, grinding welds, concrete surface prep — a 4.5-inch angle grinder with a 6 to 8 amp motor is the right starting point. The 4.5-inch format uses the widest range of readily available discs, balances well for extended use, and handles everything from cutting rebar to smoothing a concrete floor. Variable speed is worth the premium: slower speeds for polishing pads and wire brushes, full speed for cutting and grinding. Look for a paddle switch rather than a trigger switch — the paddle requires active grip to keep the tool running, which is the safer configuration. Side handle must be included and always used; no grinder should be operated one-handed.
FAQ
Can I use a cutting disc to grind?
No. A cutting disc is engineered for forward-motion cutting only. Its thin profile cannot handle the lateral forces generated by grinding. Applying side pressure to a cutting disc is the primary cause of disc shattering. If you need to remove material from a surface, fit a grinding disc or flap disc.
Why did my disc shatter?
The three most common causes are: mounting a disc rated below the grinder's RPM, applying side pressure to a cutting disc, and using a disc that was already cracked or damaged. A fourth cause is mounting the disc incorrectly — the flange must be tightened with the proper spanner wrench, not improvised tools. Always inspect, always check the RPM rating, and always use the correct disc for the task.
What size angle grinder for home use?
A 4.5-inch grinder handles the majority of home workshop tasks and is the most practical choice for most users. The 5-inch format offers a modest increase in disc surface area but uses less common disc sizes. Larger grinders (7-inch, 9-inch) are professional tools — heavier, more powerful, and significantly more dangerous in inexperienced hands. Start with 4.5 inches.
What to Do Next
Ready to plan the workshop these tools will live in?
Design your workshop layout with the Garage Designer — map out your tool positions, bench space, and storage before you buy.
For broader workshop setup guidance, see the Workshop Setup guide — tool selection by budget and build phase, from first tools to full shop.
If you're building out the rest of your tool kit alongside the grinder, the workshop hand tools guide covers the manual tools — files, chisels, and clamps — that pair naturally with grinder work on metal and masonry. For keeping all your discs, guards, and accessories organised and within reach, see the workshop wall storage guide.