
A disorganized tool chest doesn't just look bad — it costs you time on every single project. When you're mid-task and can't find your combination square or that one screwdriver you know you own, the real problem isn't the mess. It's the system, or the lack of one.
The most effective tool chest organization isn't based on tool categories. It's based on frequency of use. The tools you reach for every day belong at the top, within easy reach. The tools you pull out once a month belong at the bottom. Once that principle clicks, organizing becomes straightforward — and staying organized becomes easy.
How to Organize a Tool Chest — Step by Step
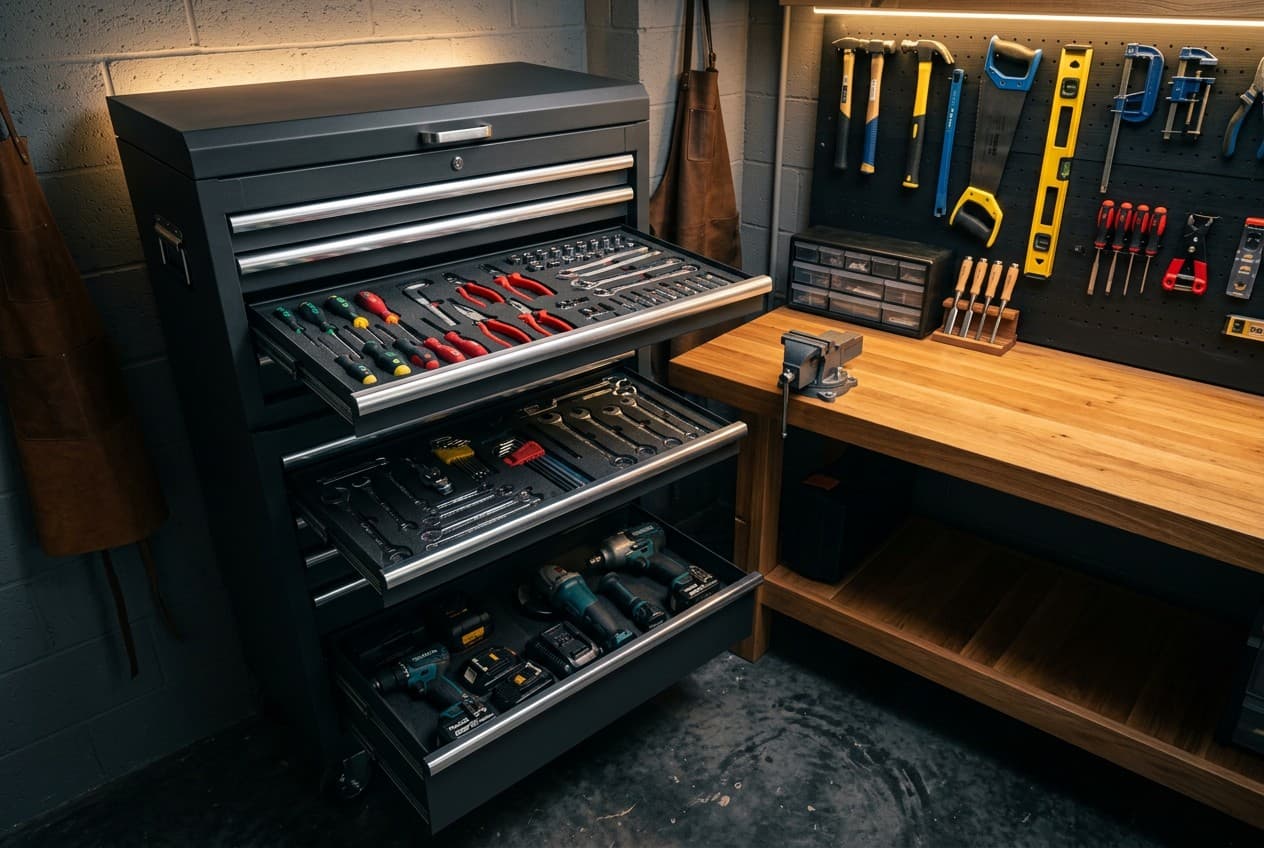
Tool Chest Drawer Zones
Total: 5-drawer chestTool Placement by Drawer Zone
| Tool / Item | Use | Est. Cost | Priority |
|---|---|---|---|
| Tape Measure | Top drawer — daily access | Essential | |
| Combination Square | Top drawer — daily layout and marking | Essential | |
| Utility Knife | Top drawer — constant use across tasks | Essential | |
| Pencils / Marking Pen | Top drawer — every session | Essential | |
| Chalk Line | Top drawer — layout work | Essential | |
| Screwdriver Set | Second drawer — multiple times per week | Essential | |
| Needle-Nose Pliers | Second drawer — weekly gripping and bending | Essential | |
| Adjustable Wrench | Second drawer — frequent fastening tasks | Essential | |
| Claw Hammer | Middle drawer — regular striking use | Essential | |
| Rubber Mallet | Middle drawer — assembly and fitting | Recommended | |
| Chisels (set) | Middle drawer — woodworking and prying | Recommended | |
| Hand File Set | Middle drawer — deburring and shaping | Recommended | |
| Drill Bit Set | Fourth drawer — power tool accessories | Essential | |
| Socket Set (rail) | Fourth drawer — organized on rail | Recommended | |
| Angle Finder / Bevel Gauge | Bottom drawer — specialty and occasional use | Optional |
Maintaining the System Over Time
The hardest part of tool chest organization isn't the initial setup — it's the ongoing discipline of putting things back. The fix is simple: make returning a tool to its drawer the last physical step of any task, not an afterthought. If you're done drilling, the bit goes back in the fourth drawer before you move on. That single habit prevents 90% of the drift that turns a tidy chest into chaos.
Beyond the daily habit, schedule a quarterly audit. Pull each drawer out, check that tools are in their zones, identify anything that's crept out of place, and note any new tools that need a designated home. A quarterly reset takes fifteen minutes and saves hours of searching over the rest of the year. One additional tip that works well in practice: keep a small "staging area" — a tray on the workbench or a hook on the wall — for tools currently in active use on a project. This makes it clear which tools are deployed versus which are available, and it removes the guesswork when you're mid-job and your hands are full.
FAQ
What size tool chest do I need?
For a home workshop or serious DIYer, a five-drawer chest in the 26–41 inch range handles most collections comfortably. If you have a large set of power tool accessories or multiple socket sets, look for a chest with at least one deep bottom drawer. If you're just starting out, a smaller three-drawer chest is easier to keep organized and can be upgraded later. The rule of thumb: fill no drawer more than 80% — you need room to see and access everything without digging.
Should I organize by tool type or by project?
Organize by frequency of use, not by tool type or project. Grouping by project (e.g., a "plumbing drawer") sounds logical but breaks down quickly because many tools serve multiple projects. Grouping strictly by type (all cutting tools together) ignores the fact that a tape measure used daily and a hand saw used monthly have nothing in common except their category. Frequency-based zones ensure the tools you need most are always within reach, regardless of which project you're on.
What are foam drawer liners and are they worth it?
Foam drawer liners are sheets of open-cell or closed-cell foam cut to fit your drawer dimensions. The best setups use two layers of contrasting colors: you trace each tool's outline, cut through the top layer only, and peel it away to create a colored nest in the shape of every tool. The result is a drawer where every tool has an obvious home — and where a missing tool is immediately visible as an empty colored silhouette. For top and second drawers (daily-use tools), foam inserts are absolutely worth the two or three hours of setup. For deeper drawers with bulkier accessories, plastic dividers and stack-on organizers are more practical.
What to Do Next
Once your tool chest is organized, the next step is making sure your entire workshop is laid out to support the way you work — not fight against it.
Design your workshop layout with the Garage Designer — plan your bench position, storage zones, and workflow paths before you move a single piece of furniture.
For more on setting up a productive workspace from the ground up, see the full workshop setup guide.
A well-organised tool chest works best alongside good wall storage for larger tools and accessories — the workshop wall storage guide covers pegboards, wall tracks, and overhead systems that keep your bench and drawers clear. If your chest is full of saw blades and drill bits, you might also find the workshop saws guide useful for rationalising which cutting tools are actually worth keeping.