
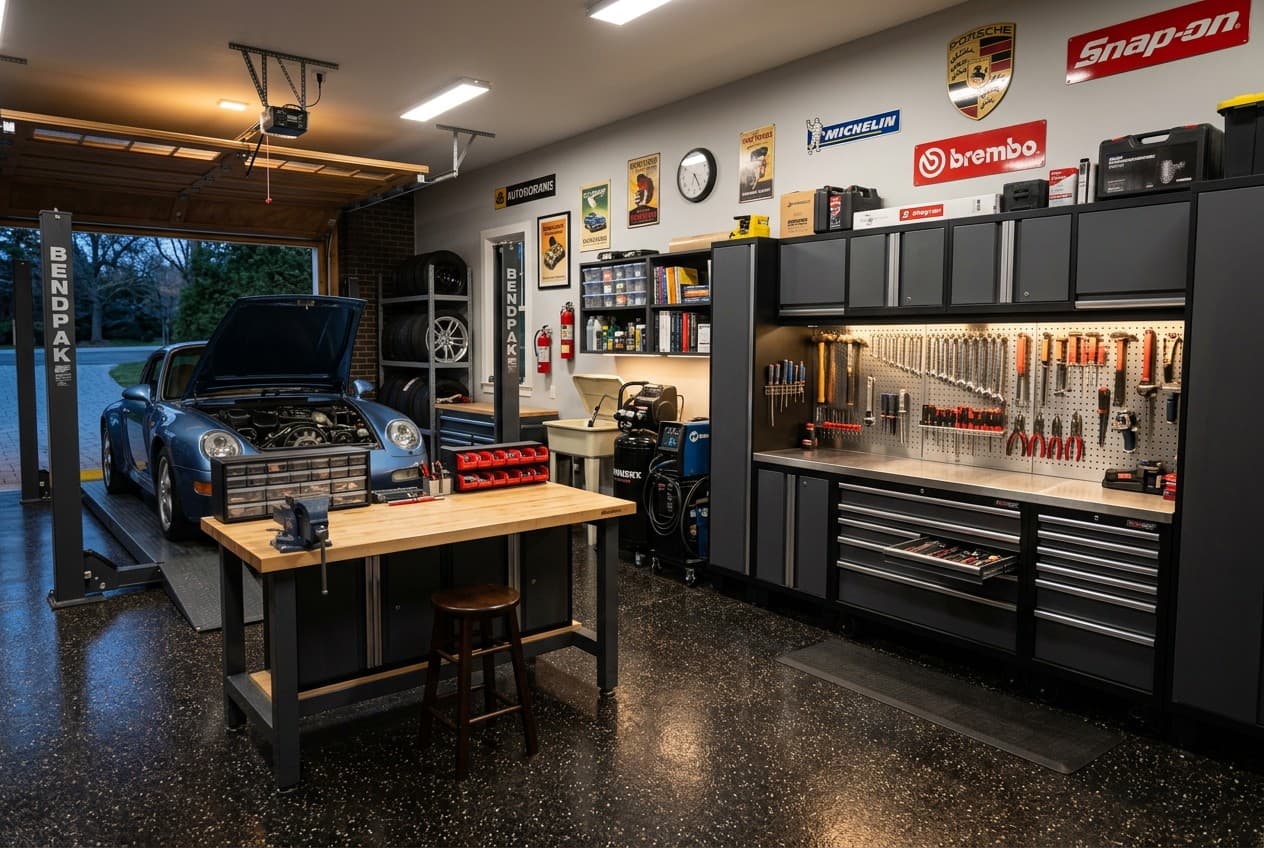
What a Garage Workshop Actually Needs to Be Functional
The gap between a pile of tools and a workshop is a zone plan. Tools alone — even expensive ones — don't create a workspace. What creates a workspace is a defined bench position, clear aisle access to each machine, wall storage that keeps everything visible, and adequate lighting.
This guide gives you ideas by budget tier and garage size, grounded in how each type of workshop is actually used. Every layout here is buildable — not aspirational.
Workshop Type First, Tools Second
Before choosing a layout, choose your primary workshop discipline. The discipline determines which tools are non-negotiable and how much floor space each requires.
| Workshop Type | Core Tools | Minimum Space | Primary Constraint |
|---|---|---|---|
| General DIY / repair | Workbench + drill + jigsaw + hand tools | 80 sq ft | Access to bench and electrical |
| Woodworking (power tools) | Table saw + miter saw + workbench | 200 sq ft | Outfeed clearance around table saw |
| Woodworking (hand tools) | Solid workbench + hand tool wall | 100 sq ft | Bench quality + storage |
| Metalworking / welding | Bench + angle grinder + welder | 200 sq ft | Ventilation + fire safety clearance |
| Electronics / maker | Desk + soldering station + storage | 60 sq ft | Lighting + outlet density |
Once you know the discipline, the layout follows from the space requirements of the primary tool.
Workshop Idea 1: Starter One-Wall Shop
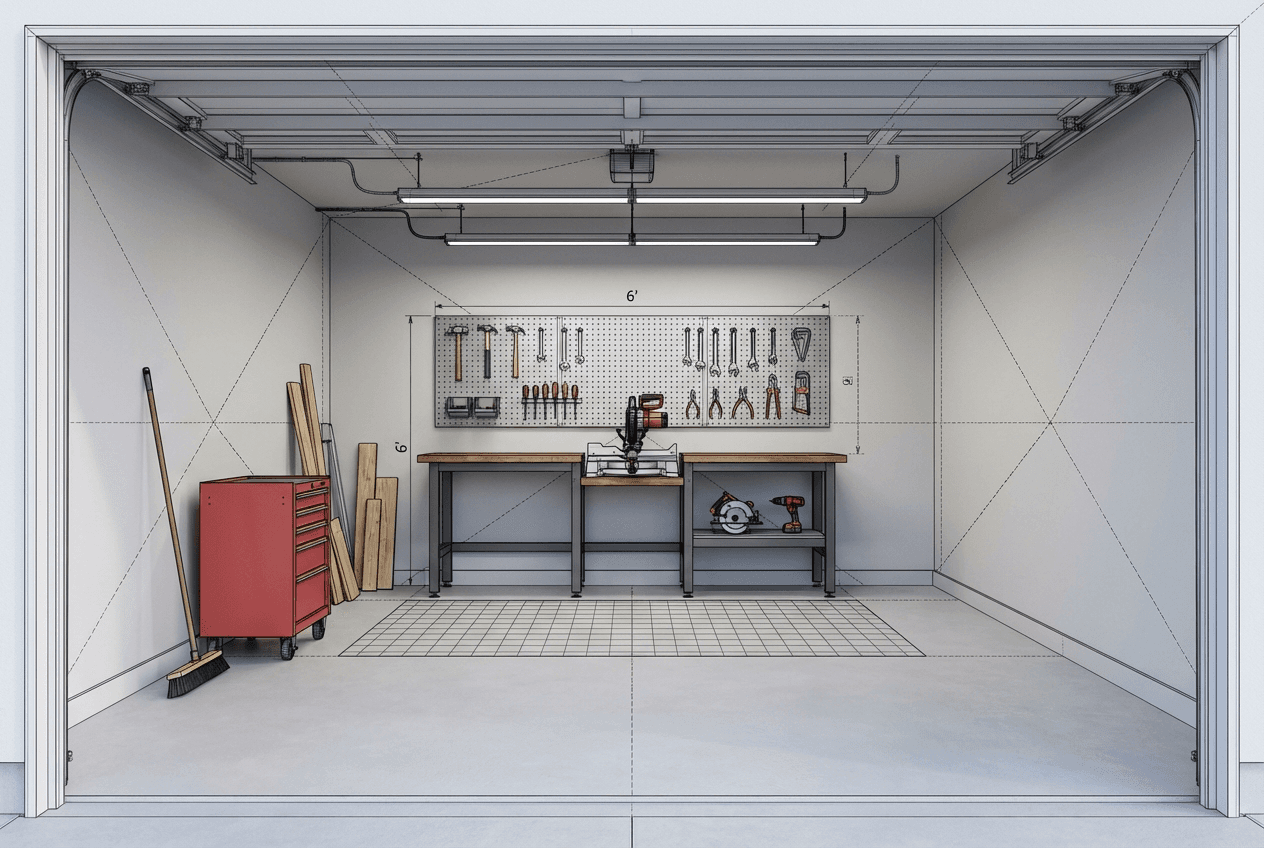
The simplest functional workshop: one workbench against the back wall, one pegboard or French cleat panel above it, and organised tool storage. Everything else is secondary.
Starter One-Wall Workshop (1-Car)
Total: 240 sq ft (shared with vehicle)What makes this work: everything is against the back wall. The car still fits. The bench is full-width and properly lit. This is a functional workshop, not a compromise — it just doesn't include stationary power tools yet.
Budget: $400–$900 (steel-frame bench + pegboard + wall shelves + lighting)
Workshop Idea 2: Woodworking Shop (1-Car, No Vehicle)
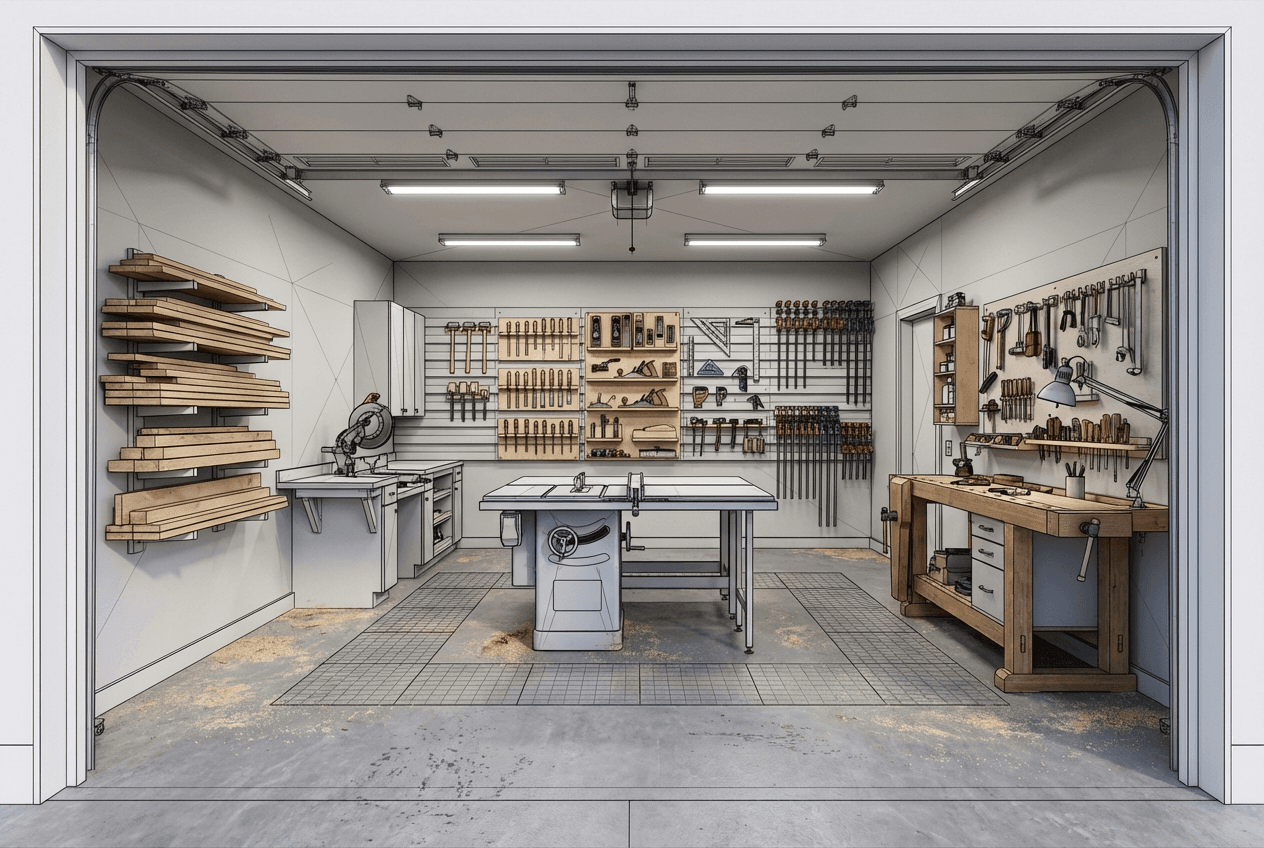
Give up the car, gain a real shop. A 1-car garage without a vehicle gives you 240 sq ft to work with — enough for a table saw in the center with real outfeed clearance.
Woodworking Shop — 1-Car (No Vehicle)
Total: 240 sq ft
Budget: $1,500–$4,000 (table saw + workbench + miter saw + French cleat + lighting)
Workshop Idea 3: Multipurpose 2-Car Shop
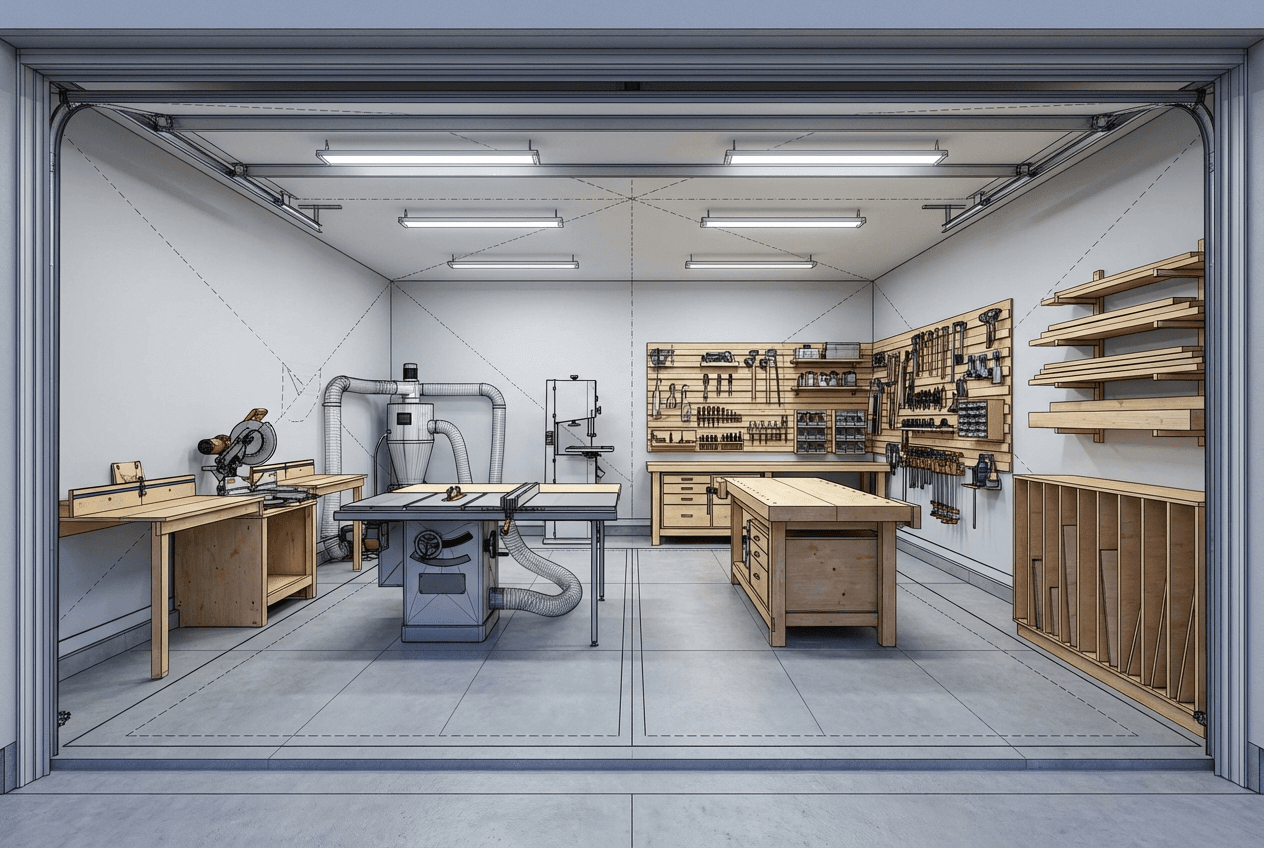
A 2-car garage (440 sq ft) gives you room to separate the noisy, dusty power tool zone from the assembly and hand tool area. This is the layout where a garage workshop starts to feel like a real shop.
Multipurpose 2-Car Shop (20×22 ft)
Total: 440 sq ftWhat separates this from a pile of tools: the zone division. The dust-generating machines have their own zone. The assembly area stays cleaner. The miter saw station has a dedicated wall with outfeed support — not a saw on a folding stand in the middle of the floor.
Budget: $4,000–$12,000+ (depends heavily on machinery choices)
Budget Tiers
Garage Workshop Setup Budget Tiers
- Steel-frame workbench (24×72 in) — $150–$250
- Drill + jigsaw + circular saw (cordless combo) — $150–$400
- Pegboard wall panel + hooks — $60–$120
- LED shop light × 2 — $80–$140
- Hand tool set (basic) — $80–$150
- Solid workbench with vise — $300–$700
- Contractor table saw — $400–$800
- Miter saw + stand — $300–$600
- French cleat wall (DIY) — $100–$200
- LED lighting (4× shop lights) — $150–$300
- Rolling tool chest — $200–$500
- Cabinet table saw — $1,500–$4,000
- Jointer + planer — $1,000–$3,000
- Hardwood workbench (Roubo/cabinetmaker style) — $800–$2,500
- Dust collector + ductwork — $600–$1,500
- Full French cleat wall (built out) — $200–$600
- Epoxy floor + full lighting — $1,000–$3,000
The Sequencing That Matters
Wrong order (common): buy the table saw → find somewhere to put it → wonder why the shop doesn't work.
Right order:
- Define the primary discipline
- Draw the zone plan (even rough)
- Install the electrical circuits you need (before walls and floor go in)
- Floor the space (concrete, epoxy, or tiles — before any tools arrive)
- Build the wall storage (French cleat or slatwall — the anchor of the shop)
- Install lighting
- Bring in the primary machine (table saw or workbench)
- Add secondary tools and accessories
The floor and wall storage always go in before the machines. If machines arrive before the floor is done, you'll be working around them to install everything else.
Related Guides
- Small Garage Workshop Layout Ideas — detailed layout plans with tool clearance dimensions
- Best Workbench for a Small Garage Workshop — the bench decision made simple
- Workshop Wall Storage Guide — pegboard vs slatwall vs French cleat
- Workshop Lighting Guide — lumen requirements and fixture placement
- Workshop Setup Hub: Complete Guide — the full planning resource
Use the AI Garage Designer to plan your garage workshop — zone layout, tool placement, and setup recommendations for your specific garage size and workshop discipline.