
The Wall Storage Decision That Defines Your Workshop
Every garage workshop has one primary tool wall — typically the back wall behind the workbench — that does more organisational work than any other surface. Getting it right means every tool is visible, accessible in seconds, and returned to its home without friction. Getting it wrong means tools on the bench, tools on the floor, and a workspace that fights you every session.
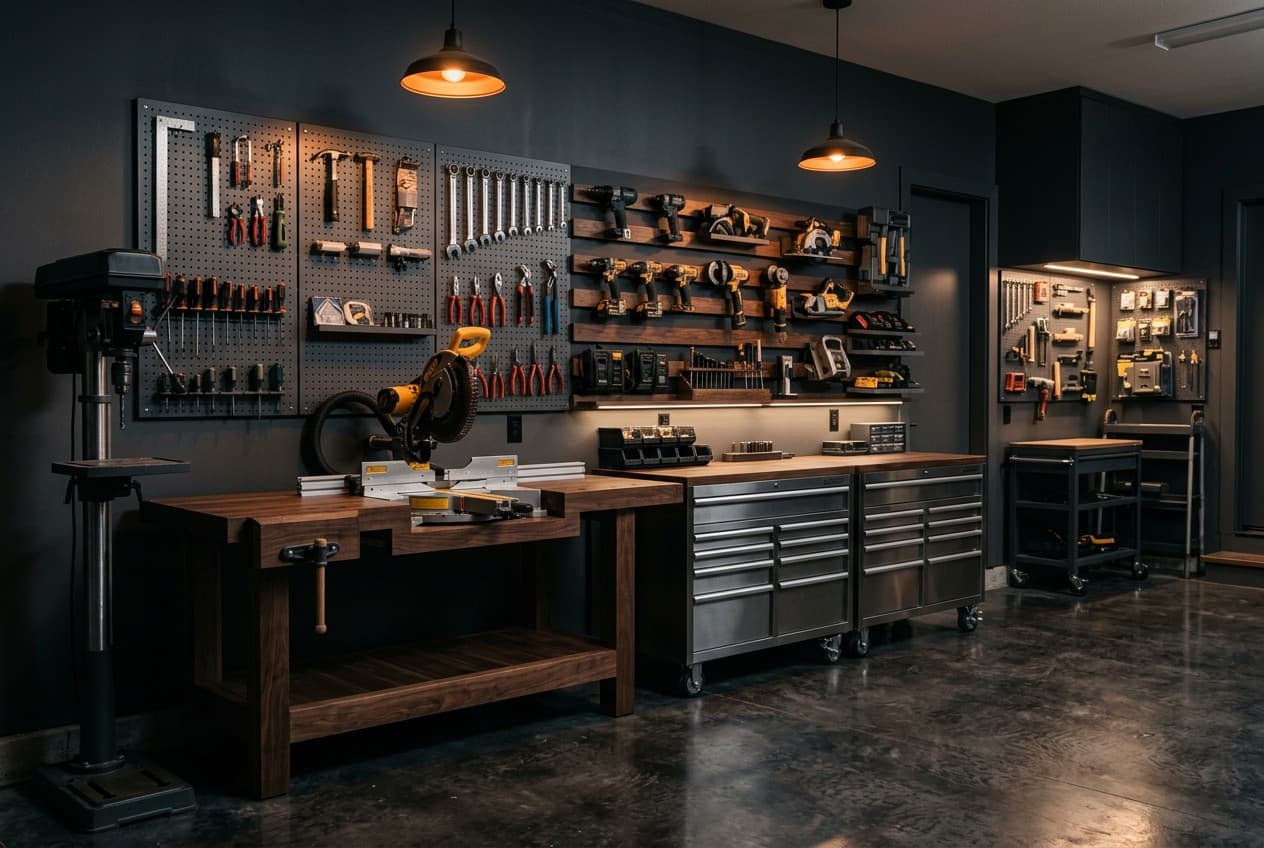
Three systems dominate workshop wall storage: pegboard, slatwall, and French cleat. They look superficially similar — holes or channels, hooks, customisable — but they differ fundamentally in cost, load capacity, flexibility, and which types of tools they handle well.
Which System Fits Your Workshop?
Match Your Workshop Type to a Wall Storage System
Full Feature Comparison
| System | Material Cost (4×8) | DIY DifficultyRecommended | Flexibility | Load (per hook) | Reconfigure Time |
|---|---|---|---|---|---|
| Pegboard (1/4 in) | $20–$45 | Easy | Medium — hooks shift | 5–15 lbs | 30 seconds per hook |
| Pegboard (1/2 in) | $30–$60 | Easy | Medium — more stable | 15–30 lbs | 30 seconds per hook |
| Slatwall (PVC) | $70–$150 per panel | Easy | High — huge accessory range | 20–50 lbs per hook | 30 seconds per accessory |
| French Cleat (3/4 in ply) | $25–$45 materials | Medium (saw needed) | Very high — build any holder | 100+ lbs per cleat run | 10 seconds — lifts off |
Pegboard: When It's the Right Choice
Pegboard gets unfairly dismissed because cheap 1/8-inch pegboard with standard hooks gives a poor experience. The hooks fall out when you pull a tool, the board flexes and gaps appear, and it feels impermanent.
The solution is 1/4-inch or thicker pegboard with locking hook clips. Locking clips cost $5–$10 per bag and snap the hook to the board so it can't pull forward when you remove a tool. This single change transforms pegboard from frustrating to functional.
When to use pegboard:
- Budget is under $100 for the wall
- Rental space or temporary install
- As a supplementary surface above the workbench (not as the primary tool wall)
- For lighter tools: screwdrivers, wrenches, hammers, tape measures
When to skip pegboard:
- Heavy power tools in holders
- Primary tool wall in a serious shop
- If you'll need to rearrange frequently (every rearrangement requires removing everything from below each moved hook)
Slatwall: The Turnkey System
Slatwall PVC panels ($70–$150 per 4×8 panel) mount to studs and accept a commercial accessory ecosystem that includes: standard hooks, double hooks, bin brackets, shelf brackets, slant shelves, bike holders, sports equipment holders, and specialty brackets for almost anything.
The real advantage: the accessory range. If you have bikes, sports equipment, garden tools, and workshop tools all on the same wall, slatwall's breadth of compatible accessories is hard to match.
Installation requirement: every panel must be screwed to studs, not just drywall. Slatwall loaded past 30 lbs per hook will pull away from drywall-only mounting. Use a stud finder and hit a stud every 16 inches.
Cost reality: the panels are affordable, but the accessories add up quickly. Budget $150–$400 in accessories to meaningfully populate a full wall.
French Cleat: The Workshop Standard
A French cleat is a strip of 3/4-inch plywood or MDF with a 45° rip cut along the top edge. Horizontal strips are mounted across the entire wall, spaced 2 inches apart. Any holder with the matching 45° profile on the back hangs anywhere on the wall, can hold extreme loads, and lifts off for repositioning in seconds.
Building it:
- Rip 3/4-inch plywood into 3-inch-wide strips at 45° on the table saw
- Mount strips horizontally across the wall, screwed to studs every 16 inches, spaced 2–3 inches apart
- Build or buy holders with the matching 45° back profile
Material cost for a full 8-ft wide × 6-ft tall French cleat wall: $80–$150 in plywood. Time: one weekend.

Holder options:
- DIY plywood holders (scraps + glue) — $0–$5 each
- Commercial French cleat tool holders — $10–$40 each (many manufacturers now sell pre-made)
- Commercial French cleat bins and shelves — $15–$50 each
French Cleat — Workshop Reality
- ✓Lowest material cost of any wall system (3/4 in ply + table saw)
- ✓Highest flexibility — any holder lifts off in seconds, repositions instantly
- ✓Extreme load capacity — properly built cleats hold hundreds of pounds per run
- ✓Custom holders for any tool, jig, or oddly-shaped item
- ✓No proprietary ecosystem — build what you need
- ✗Requires a table saw (or circular saw with guide) to build — not tool-free
- ✗Raw wood appearance — less polished than slatwall in a finished space
- ✗Holder inventory must be built or sourced — initial setup takes time
- ✗Not ideal for non-tool items (sports equipment, bikes) vs slatwall's broad accessory range
- ✗Wall must be reasonably flat — significantly bowed or uneven walls make alignment difficult
Installation Notes for All Three Systems
All three systems require the same foundational rule: every mounting point must hit a stud. Hollow-wall anchors are insufficient for anything carrying real tool weight. Use a stud finder before mounting any panel or cleat strip.
For walls with existing drywall, mark all studs before cutting or drilling. For walls without drywall (exposed studs), you can mount directly to the studs without a backing panel.
Minimum stud engagement: 1.5 inches of screw into the stud wood. For 1/2-inch drywall + 3/4-inch panel, use a 3-inch screw minimum.
Related Guides
- Small Garage Workshop Layout Ideas — where the wall system fits in your overall layout
- Garage Tool Storage Ideas for DIYers — wall storage vs rolling chest vs cabinet
- Workshop Setup Hub: Complete Guide — the full planning resource
Use the AI Garage Designer to plan your workshop wall storage — layout, system type, and holder configuration matched to your tool collection and garage dimensions.
If you've filled the walls and still need more capacity, the overhead garage storage guide covers ceiling-mounted racks and hoists that turn unused vertical space above head height into practical storage — a natural extension of any wall system.