
Why a Shed Office Is the Best Remote Work Setup
The shed office solves the central problem of working from home: separation. When your office is in your house — a corner of the bedroom, the dining table, a converted closet — work bleeds into home life and home life bleeds into work. Neither is done well.
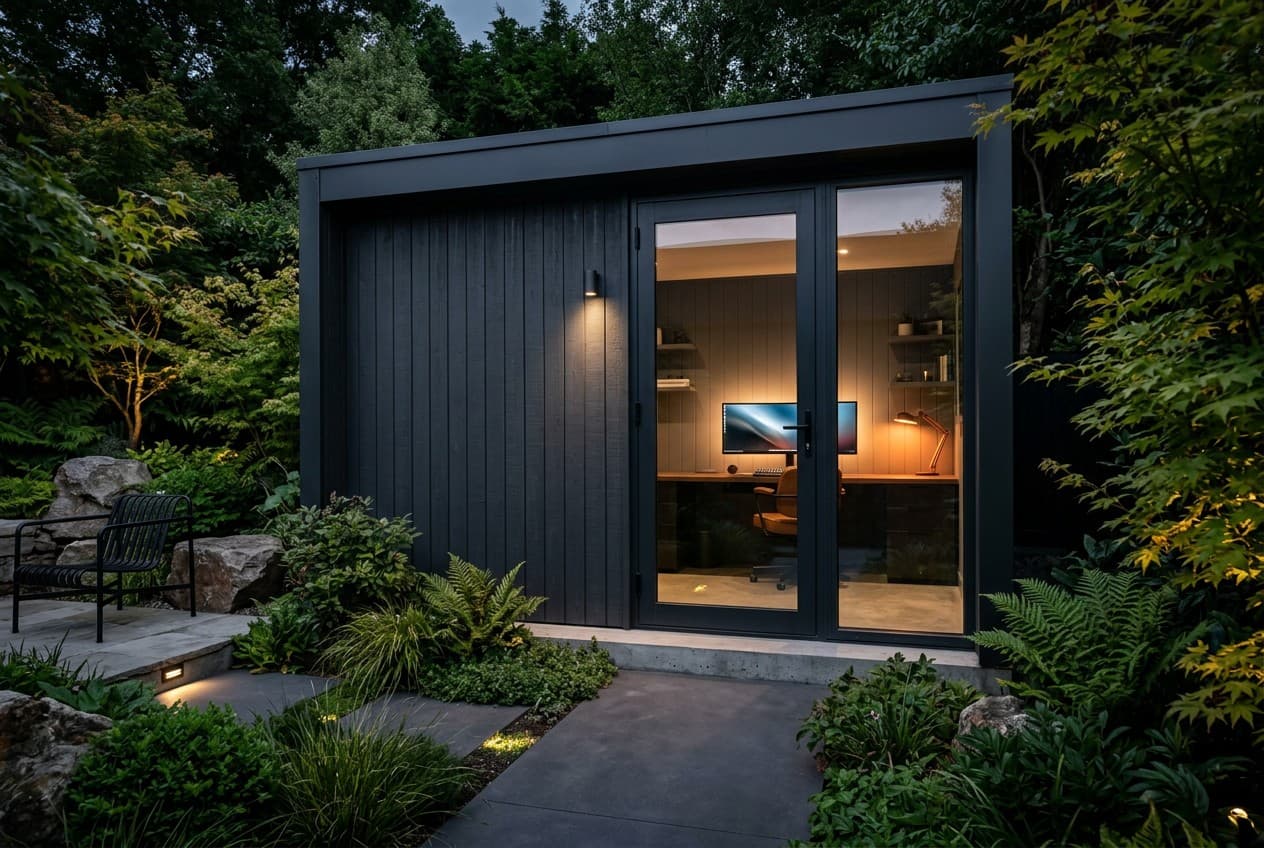
A shed office is psychologically and physically separate. You commute 30 seconds across the garden. You arrive at a professional space. You close the door when work is done. This single feature — the separateness — is worth more than any ergonomic chair or productivity app.
I've helped design and build several shed office conversions. The technical challenges are real but all solvable. This guide covers every one.
In This Guide
Is Your Shed Suitable for Conversion?
Before investing in a shed office conversion, honestly assess your existing structure.
Structural Checklist
Foundation: Is it level and solid? A shed that's shifted on its base will need relevelling before any interior work is worthwhile.
Roof: No active leaks, no significant sagging. A shed with roof issues should have those resolved first — water ingress will destroy interior work.
Walls: Check for rot at the base of wall panels and door frames. Probe with a screwdriver — soft spots indicate rot. Isolated rot can be repaired; widespread rot means replacement.
Size: The minimum for a functional office is 8×10 feet (80 sq ft). Comfortable is 10×12 (120 sq ft). For regular video calls where you need a clean background and some pacing space, 12×16 or larger is ideal.
If the existing shed isn't suitable: See our Build vs Buy a Shed guide for options. Prefab garden offices purpose-built for office use are an increasingly competitive market.
Step 1: Permits and Regulations
Check your local planning/zoning regulations before spending any money.
In the US, a shed used as a home office typically falls under:
- Accessory Dwelling Structure rules — size limits vary by municipality (commonly 200–1,000 sq ft without permits)
- Electrical permit — almost always required for new electrical service to a detached structure
- Building permit — may be required for significant modifications (adding windows, structural changes)
In the UK, most garden office conversions are permitted development if they meet size and height limits, but check with your local planning authority for boundary distances and height rules.
The general rule: If it's getting electricity, get an electrical permit. The cost is modest and it protects you at sale.
Step 2: Insulation — The Make-or-Break Investment
An uninsulated shed is a comfortable office for maybe 5–6 months per year in a temperate climate. Insulating properly turns it into a year-round space.
Target R-Values for a Shed Office
| Area | Recommended R-Value | Notes |
|---|---|---|
| Walls | R-13 to R-19 | R-13 with 2×4 framing, R-19 with 2×6 |
| Ceiling | R-30 to R-38 | Heat rises — prioritise this |
| Floor | R-10 to R-15 | Critical if on concrete slab or bare ground |
Insulation Options
Fiberglass batts: Standard option for stud-framed walls. Inexpensive, widely available, DIY-friendly if you dress appropriately (long sleeves, gloves, dust mask). Fill the stud cavity, cover with vapour barrier, then close with drywall or OSB.
Rigid foam board (polyiso or XPS): Better for sheds with non-standard framing or for adding insulation to the inside of existing walls. Higher R-value per inch than fibreglass. Tape seams with foil tape.
Spray foam: The most airtight option. DIY cans for gaps and penetrations; professional spray for full cavities. More expensive but eliminates thermal bridges.
Don't Forget the Door
A hollow-core door (common on sheds) is an R-1 thermal disaster. Replace it with:
- A solid-core door: R-3 to R-4
- An insulated steel door: R-5 to R-10
And weatherstrip every edge. Air infiltration is a major heat loss pathway in sheds.
Step 3: Electrical Service — Running Power to the Shed
This is the most technically complex part of a shed office conversion and the one most worth hiring a professional for.
The Three Options
Option 1: Extend from house panel (most common) Run a new circuit from your main electrical panel to a subpanel in the shed. This is the right approach for any serious shed office — it gives you proper capacity and allows for future expansion.
A typical shed office subpanel: 60–100A rated, 4–6 circuits. Provides enough for lighting, multiple outlets, HVAC, and powered equipment simultaneously.
Underground cable: In the US, UF-B (underground feeder) cable must be buried 24 inches deep (12 inches with conduit). PVC conduit is preferred — it protects the cable and allows future additions without digging.
Option 2: Solar panel + battery system For sheds without practical access to the house panel, a solar + battery system can power lighting, a laptop, a monitor, phone charging, and a router. Not suitable for HVAC or high-draw equipment, but viable for minimal office setups.
Option 3: Extension cord (temporary only) Not code-compliant for permanent installation, creates a tripping hazard, and is undersized for heating equipment. Use only while planning proper electrical installation.
Outlet and Circuit Planning
For a properly equipped shed office, plan for:
- 1 × 20A circuit for computer, monitors, and electronics
- 1 × 20A circuit for HVAC (mini-split or dedicated heating unit)
- General lighting circuit (15A is sufficient)
- Exterior outlet (GFCI, weatherproof)
- Ethernet/data rough-in (run conduit alongside electrical — you'll thank yourself later)
Outlets: 1 per wall at minimum, 2 at the desk wall. USB charging outlets at the desk are worth including during rough-in.
Step 4: Internet Connectivity
A fast, reliable connection is non-negotiable for a home office. Your options:
Wi-Fi Extension
Mesh Wi-Fi node placed near the shed: Requires some signal from the house to work. A mesh node positioned in a window facing the shed can often provide workable speeds at distances up to 50–100 feet. Not ideal — walls, weather, and interference affect performance.
Powerline adapters through a pre-existing power circuit: Can work if the shed is on the same phase as the house. Inconsistent in practice.
Hardwired Ethernet (Recommended)
When you're running electrical conduit from house to shed, run a separate conduit for Cat6 Ethernet or fibre. This is negligible additional cost during installation and provides permanent, reliable, full-speed internet to the shed.
Video Call Requirements: Will Your Connection Hold?
This determines whether Wi-Fi is sufficient or you need hardwired Ethernet:
| Platform | Min Upload | Min Download | Recommended for Reliable HD |
|---|---|---|---|
| Zoom (group HD) | 3.8 Mbps | 3.8 Mbps | 10+ Mbps both directions |
| Microsoft Teams (group) | 4.0 Mbps | 2.5 Mbps | 10+ Mbps both directions |
| Google Meet (group HD) | 3.2 Mbps | 3.2 Mbps | 10+ Mbps both directions |
| Slack Huddles | 1.5 Mbps | 1.5 Mbps | 5+ Mbps both directions |
The test: Run a speed test from where the shed is (or will be) using your phone on Wi-Fi. If you're getting under 10 Mbps, hardwire with Ethernet — no amount of mesh optimisation will reliably fix a weak signal through exterior walls at 50+ ft. If you're above 20 Mbps, a quality mesh node in a window facing the shed will work for most use cases.
If conduit is already run: Pull Cat6A cable — it supports 10 Gbps and is future-proof.
A patch panel in the shed subpanel connects to a small switch for multiple devices. Total additional cost when doing it at the same time as electrical: $100–$300 in materials.
Step 5: Climate Control
Mini-Split Heat Pump — The Right Answer
For a year-round shed office, a mini-split heat pump is the correct solution. It handles both heating and cooling efficiently, runs quietly (critical for video calls), and doesn't require ductwork.
Sizing: For a 100–150 sq ft insulated shed, a 9,000 BTU mini-split is sufficient. For 150–300 sq ft, use 12,000 BTU.
DIY vs professional installation: Mini-splits require refrigerant line sets and typically need a licensed HVAC technician to charge the system. Some newer "DIY mini-splits" (MrCool, Pioneer) come pre-charged and can be installed without an HVAC licence, but professional installation is more reliable.
Cost: $800–$1,500 for the unit; $500–$1,500 for professional installation.
Budget Heating Alternatives
If a mini-split is outside budget:
- Electric panel heater (thermostat-controlled): Effective for an insulated shed. Higher operating cost than a heat pump but lower upfront cost.
- Oil-filled electric radiator: Silent, safe, no exposed elements — good for an office environment.
- Propane heater (vented): Can be powerful for larger spaces but requires ventilation and is not suitable as a permanent solution in an enclosed office.
Step 6: Interior Design for Productivity
A shed office should feel like a professional workspace, not a storage room with a desk shoved in it.
The Essential Layout
The desk position: Natural light from the side, not behind the monitor (creates glare) or behind you (creates harsh shadows on camera). North-facing or east-facing windows are ideal.
The background: What appears behind you on video calls matters. A clean wall, a bookshelf with books and plants, or framed artwork. Not clutter, not the back of a door, not random equipment.
Storage: Sufficient for your work — not more, not less. A shed office that becomes a storage annex has failed its purpose.
Recommended Office Furniture
Desk: A standing desk or sit-stand desk transforms the work experience. At minimum: a large, stable surface (60×30 inches or larger). Flexispot Standing Desk is a popular mid-range option.
Chair: Your chair is where you spend every working hour. Don't buy it on price. An ergonomic chair with lumbar support, adjustable armrests, and breathable mesh back is a professional necessity.
Monitor setup: Dual monitors on a monitor arm eliminate clutter and improve ergonomics. A monitor arm frees up desk surface and allows perfect positioning.
Acoustics and Soundproofing
A shed office needs to be quiet from both directions: external noise shouldn't disturb your work, and your calls shouldn't disturb the household.
Practical acoustic improvements:
- Acoustic panels on walls (reduce reverberation, improve call audio)
- A solid-core door with full weatherstripping
- Mass-loaded vinyl on the wall facing the house (if needed)
- Soft furnishings — a rug, fabric panels, upholstered seating all absorb sound

For video call audio: A dedicated USB microphone is more impactful than any acoustic treatment. Blue Yeti or Shure MV7 are popular professional choices.
Shed Office Conversion Cost Breakdown
| Component | DIY Cost | Professional Cost |
|---|---|---|
| Insulation | $300–$800 | $800–$2,000 |
| Electrical (subpanel + circuits) | Not recommended DIY | $1,500–$4,000 |
| Internet (Cat6 run) | $100–$300 | $200–$500 |
| Mini-split HVAC | $800–$1,500 (unit only) | $1,500–$3,500 all in |
| Drywall/interior finish | $200–$600 | $800–$2,000 |
| Flooring (LVP) | $200–$600 | $500–$1,500 |
| Furniture and equipment | $500–$3,000 | — |
| Total | $4,000–$8,000 | $8,000–$20,000 |
Tax Deductions for a Shed Office
A dedicated detached office is the cleanest possible home office tax deduction — 100% of the structure is used for business. Unlike a spare bedroom that doubles as a guest room, a shed office has no "regular and exclusive use" ambiguity.
| Method | How It Works | Typical Annual Deduction |
|---|---|---|
| Simplified (IRS) | $5 per sq ft, up to 300 sq ft max | $600/year (120 sq ft shed) |
| Regular | Actual expenses prorated by office % of total home sq ft | Varies — often $1,500–$4,000/year |
What's deductible under the regular method: The shed's proportion of mortgage interest (or rent), homeowners insurance, utilities, repairs, depreciation of the structure, and internet costs. A 120 sq ft shed office on a 2,000 sq ft property represents 6% of total home — that 6% of qualifying expenses is deductible.
Over 10 years, even the simplified deduction recovers $6,000 — a meaningful offset against the build cost. Consult a tax professional for your specific situation, but the financial case for a separate office structure is strong.
Ready to Plan Your Shed Office?
Upload a photo of your shed or space to the AI Garage Designer and get a personalised conversion plan — specific to your space, working style, and budget.
Related guides: